Archive for the 'Pork' Category

Homemade Smoked Bacon

Homemade Smoked Bacon
I don’t think I can compete with the superlatives bestowed upon bacon on the internet.  My love of bacon is not as great as that professed on some sites.  I don’t find the idea of chocolate covered bacon appetizing.  I don’t even like bacon a cheeseburger.  To be honest, I rarely eat bacon by itself.  Bacon has, however, become an integral part of my cooking as an ingredient.

One of the advantages of moving to Virginia is that there is a history of smoking in the state and, therefore, there are good local bacons available.  Those at the farmer’s market are even better. In California, I even made fresh (unsmoked) bacon. When I saw a pork belly at EcoFriendly Foods stand several weeks ago, I knew it was time to try smoked bacon again.

This isn’t my first try at smoked bacon.  My first attempt used a maple syrup based cure and the bacon was oddly sweet.  My next attempt was a more savory cure based on a pancetta recipe.  This bacon is a refinement of the second attempt.

While it may be self-aggrandizing, this is the best bacon I’ve tasted.  The cure ingredients only serve to enhance and complement the natural pork flavor as does the smoke.  It’s almost too flavorful to eat by itself.  Almost.  But that makes it even better when it’s used as an ingredient.

Smoked Bacon
Adapted from Charcuterie: The Craft of Salting, Smoking, and Curing

One 5 lbs. (2.25 kg) pork belly, skin on

Dry Cure:
4 garlic cloves, minced
12 g pink salt
50 g kosher salt
26 g light brown sugar
20 g coarsely ground black pepper
10 g crushed juniper berries
4 bay leaves, crumbled
5 sprigs of thyme, leaves only
4 sprigs of rosemary, leaves only
3 dried red chili peppers, crumbled

  1. Combine the cure ingredients in a bowl and mix well.  Place the belly in a jumbo Ziploc bag or other large container.  Spread the cure mixture on all sides of the pork belly.
  2. Refrigerate the pork belly for 7 to 10 days, overhauling the pork belly by turning it over every other day, until it is firm at its thickest point.
  3. Remove the pork belly from the refrigerator, rinse the pork belly, dry it with paper towels, then allow it to dry in the refrigerator overnight on a rack.
  4. Hot smoke the pork belly over hickory until it reaches an internal temperature of 150ºF, 2 to 3 hours.
  5. Allow the pork belly to cool to room temperature, then chill in the refrigerator.
  6. Cut into thick slices.
  7. The bacon can be refrigerated for several weeks or frozen nearly indefinitely.

Yields approximately 4 lbs/1.75 kg bacon.

Advertisement

Salsiccie di Lucania (Pork Sausage from Lucania)

Pork Sausage from Lucania

I have something of a love-hate relationship with my sausage stuffer.  I adore sausage but, now that I have a sausage stuffer, I insist that whatever sausage we eat at home be homemade.  There’s a certain amount of setup required to make sausages and I feel the need to make a large batch to make it worth the effort.  Therefore, I ended up rolling the dice when trying a new recipe as to how they’ll turn out.

In this case, I knew I hit the jackpot as soon as I offered Angela a piece of the sample I used to check the seasoning.  No words were needed.  I could see the answer in her face.  And while Angela likes sausage, her level of appreciation is not equivalent to my own.  This sausage may have changed her mind.

I had been looking for a new Italian sausage recipe to use. My last attempt, while decent, had too much coriander seed for one. It just wasn’t quite right.

While this sausage can fill in for an “Italian sausage” (it is in fact a recipe of Italian extraction), it is not an Italian sausage in the traditional American sense.  It doesn’t have the fennel seed which is almost the defining characteristics of such sausages. It does, however, have a lot of garlic and ginger to provide flavor. It’s a lot simpler but still tasty. It can also be used as a breakfast sausage in a pinch (actually the first way I cooked it).

When I have 5 lbs. of sausage in the freezer, I remember why I like to have a sausage stuffer.  When viewing the cornucopia of sausages at a megamart (or even the farmer’s market for that matter), it’s hard to remember why I enjoy making my own.  Part of it’s just enjoying making sausages with Angela, part of it’s the quality, and part of it is choosing exactly what I want in a sausage.

Grinding meat for sausage

Salsiccie di Lucania (Pork Sausage from Lucania)
Adapted from Molto Italiano: 327 Simple Italian Recipes to Cook at Home

12 cloves of garlic, finely diced
1 oz. ginger, peeled and finely diced
6 oz. pancetta, chopped
5 lbs. pork shoulder, cut into 1″ pieces
1 lbs. pork fat, cut into 1″ pieces
tsp red pepper flakes
3 tbsp kosher salt
1 cup red wine

8 ft. pork sausage casings

  1. In a large bowl, combine all the ingredients except for the red wine  sausage casings.  Refrigerate until thoroughly cooled.
  2. Place the bowl containing the meat in an ice bath.  Grind the meat mixture through the smallest holes into another bowl in an ice bath.
  3. Add the wine to the mixture and beat with a paddle mixer at low speed for 1 minute.
  4. Cook a small portion of the sausage mixture in olive oil to verify seasoning.  While cooking the sample sausage mixture, place the remaining sausage mixture in the refrigerator.
  5. Stuff the sausage mixture into the sausage casings.  Twist into individual sausages.

Makes 6 lbs. sausages

Carnitas Caseras (Home Cooked Carnitas)

Carnitas Tacos

It’s been awhile.  It’s been quite awhile.  I could blame it on a number of things but suffice to say that I’m back.

You may remember that we recently moved from southern California to northern Virginia. Unsurprisingly, northern Virginia isn’t exactly a mecca for Mexican food.  My personal Mexican food of choice is carnitas and, unfortunately, the closest I’ve found so far in our new home is at Chipotle.

Homemade Tortilla Chips

So I decided to make my own.  These aren’t the more common carnitas found at taco stands around L.A.  These aren’t cooked for the same length of time so they don’t easily get the shredded texture of taqueria carnitas.

Instead, they are rather quickly simmered in milk before cooking the liquid off.  They’re reminiscent of an Italian recipe where pork is slowly cooked with milk.

They are quite flavorful; almost intense, as Angela described it, but at the same time mild.  The salsa (in the pictures) almost overpowered the flavor of the carnitas and I omitted it for the remainder of my tacos.  The only downside for me was that the texture was different than I was expecting.  Something that shreds more easily would work better on tacos.

These cook quickly.  Quick enough for a week night.  They go well with homemade tortilla chips and salsa.  The leftovers work well in quesadillas.

Salsa Mexicana

Carnitas Caseras (Home Cooked Carnitas)
Adapted from The Art of Mexican Cooking

4 tbsp lard or vegetable oil
3 lbs. bone-in pork shoulder, cut into 2-inch pieces
1/2 medium red onion, sliced
salt
4 sprigs of fresh marjoram
4 sprigs of fresh thyme
2 bay leaves
10 peppercorns, crushed
1 orange, cut into eights
1 cup milk

  1. Dry the pork with paper towels and season with salt.
  2. Heat the lard in a wide, heavy pan until hot.  Add the pork and fry until lightly golden, turning occasionally, about 8 minutes.
  3. Add the onions and cook until the meat is well browned, about 8 minutes more.
  4. Add the remaining ingredients, bring to a simmer, cover, and cook over low heat until the meat is cooked through and tender, 20 to 30 minutes.
  5. Remove the lid, and increase the heat, cooking until all the liquid has been absorbed (there will still be a lot of fat remaining).
  6. Remove the meat from the pot and let rest for 5 minutes.
  7. Slice the meat into small pieces and serve with corn tortillas.

Serves 6 to 8.

Homemade Guanciale

Diced homemade guanciale

Our recent move necessitated the use or disposal of any perishables.  Since that time, I’ve been missing my cured meats the most.  Luckily, we’ve been able to find some good bacon in Virginia. However, I have yet to find any thing as good as my homemade pancetta.

I have, however, made friends with a local pork farmer who comes to the Alexandria Farmer’s Market.  As a side note, his pork is very very good.  So far, I’ve only managed to get one pork belly from him (most are preordered by restaurants, mine has been turned into pancetta) but the real surprise for me was that he regularly sells pork jowls.  I’ve been to quite a few specialty markets, butchers, and Asian groceries and not once have I seen pork jowls for sale.

Homemade pancetta and guanciale drying

To me, the real coup with finding pork jowls is that I can turn them into guanciale (another hard to find product in the United States).  And my desire for guanciale is simply that it is the authentic ingredient in probably my most favorite pasta dish (and quite likely favorite food), spaghetti alla carbonara.

The most difficult part of making guanciale is finding a pork jowl.  It’s cured simply with just salt and a few seasonings.  Then it’s hung to dry.  My choice of hanging spot was in our unheated sun room.  The temperature was pretty close to right (50ºF to 60ºF) and seemed to have a pretty good humidity.  The only possible mistake I made was hanging it by a window as a pork jowl is mostly fat and light can damage fat.  I’ll have to return my drying to a mini-fridge in the future.

Until I had to go without, I didn’t realize how central cured meats like guanciale or pancetta are to my cooking. I like to keep some in the fridge to make quick, but good, pastas.  It’s an effective way to add some protein to a meal or to modify a side dish into being a complete meal.

Along with spaghetti alla carbonara, it is also traditionally used in bucattini all amatriciana.

Spaghetti alla Carbonara made with home guanciale

Homemade Guanciale
Adapted from Charcuterie: The Craft of Salting, Smoking, and Curing

One 2-lbs/1-kg pork jowl

Dry Cure:
70 g kosher salt
70 g sugar
10 g garlic, mashed
15 black pepper corns, cracked
1 large bunch thyme

  1. Rinse and pat the jowl dry.  Trim any stray tissue, glands, or hairs from the jowl.
  2. Combine the dry cure ingredients in a bowl and mix thoroughly.
  3. Place the jowl into a large zip-top bag and rub with the dry cure on both sides.  Refrigerate for 4 to 6 days, until it feels stiff all the way through.  Overhaul the cure by redistributing the cure and turning the jowl over every other day.
  4. Remove the jowl from the bag and rinse off all the cure.  Dry thoroughly.
  5. Poke a hole in the corner of the jowl with a knife.  Run a piece of butcher’s string through the hole.  Hang the jowl in a cool, dry place for 1 to 3 weeks, until it is stiff but not hard.
  6. Refrigerate for up to 3 weeks or freeze for several months.

Gnocchi di Ricotta con Salsiccia e Finocchi (Ricotta Gnocchi with Sausage and Fennel)

Ricotta Gnocchi

As previously mentioned, Angela and I have been in the processing of moving for the last month.  In the beginning of November, we packed up (or more precisely had movers pack up) our apartment in Long Beach, CA.  Two days later we flew to Washington Dulles and made our way to Alexandria, VA late at night, dropping off our cats with my parents on the way.

In the course of waiting for our household goods to arrive and looking for a new place, we were staying in a hotel.  While hotels are wonderful places to stay when you’re on vacation, they’re far from ideal as a residence.  I intentionally had picked a hotel that claimed it had a full kitchen.  Apparently, a full kitchen means a refrigerator, dishwasher, two electric burners, awful pots, and no oven.  My best laid plans of regularly cooking dinner there were quickly dashed if only because the pots (there was nothing that would qualify as a pan) were beyond awful.  But we did manage to eat in part of the time. And that’s one of the major reasons for lack of posts here. There simply wasn’t anything to post about (as well as some other logistical problems; I had my camera but didn’t have the computer I need to edit photos).

Toasted Fennel Seeds in a Mortar & Pestle

But that part of our moving ordeal (and what move isn’t an ordeal?) is over.  We have moved into our very own (rented) townhouse in Old Town Alexandria.  We have our cats who are still terrified and huddling in the basement.  We no longer have a dish washer.  The kitchen is tiny but I’ve appropriated the sun room for storage and a prep area.  My parents hated our old couch  that they bought us a new one.  We’ve spent more at Ikea that I’d like to admit and we still need to make another trip there.  We have our Christmas tree up.  While it may not be quite there yet, it’s slowly turning into home.

And last night, we had our first dinner guest.  My cousin Alison drove down from D.C.  Because she’s family, I had no issue with using her as a guinea pig for a new recipe.  I had purchased some ricotta at the Alexandria Farmer’s Market that I needed to use. I originally thought of ravioli but I didn’t quite have that much time on a weekday (I’m not quite set in my work schedule yet). Instead, I decided on ricotta gnocchi. I had some time to stop at a grocery store so I decided to make the full ricotta gnocchi with the suggested sauce and all.

The ricotta gnocchi were very easy to make.  Much easier than pasta or potato gnocchi.  The sauce wasn’t difficult (it’s mainly chopping) but I had problems with the Italian sausage not producing enough fat so I kept having to add olive oil.  There also wasn’t much liquid in my tomato sauce so I had to add water to the overall sauce so that the sauce could actually simmer.  This does produce a lot of sauce relative to the amount of gnocchi.  It’s almost a more Italian-American ratio than Italian but you can choose to eat as much or as little of the sauce as you choose.

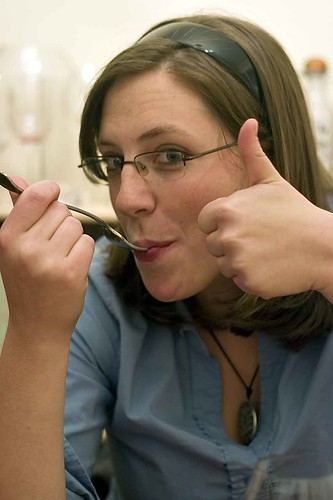
If you examine the pictures, I’m pretty sure you can tell Alison’s opinion of the meal.  I heartily concur.  Alison was going to look for them at the store but they’re easy enough to make that I’d recommend making them yourself.

Ricotta Gnocchi Cooking

Gnocchi di Ricotta con Salsiccia e Finocchi (Ricotta Gnocchi with Sausage and Fennel)
Adapted from Molto Italiano: 327 Simple Italian Recipes to Cook at Home

Gnocchi:

Alison enjoying Ricotta Gnocchi

1 1/2 lbs. fresh ricotta
1 cup all purpose flour
2 large eggs, beaten
1 tbsp chopped Italian parsley
1 tsp salt
1/2 tsp black pepper
1/4 tsp grated nutmeg
olive oil

Sauce:

2 lbs. italian sausage, removed from casings and crumbled
1 tbsp fennel seeds, toasted and ground
1 tbsp red pepper flakes
1 red onion, finely diced
1 fennel bulb, trimmed, cored, and finely diced
1 carrot, finely diced
1 rib of celery, finely diced
4 garlic cloves, thinly sliced
2 cups Basic Tomato Sauce
salt and pepper
Pecorino Romano

  1. Place the ricotta in a cheese cloth lined sieve set over a bowl.  Cover with plastic wrap and refrigerate overnight.
  2. To make the gnocchi, place the drained ricotta in a bowl with the flour, eggs, parsley, salt, pepper, and nutmeg.  Stir together with a wooden spoon until a soft dough forms.  Shape the dough into 2 tbsp balls and place them on a tea-towel covered baking sheet lightly dusted with flour.
  3. Cook the gnocchi in salted boiling water until they all float, about 7 minutes.  Place the cooked gnocchi in an ice bath and transfer them to a bowl.  Toss with olive oil and refrigerate until ready to use.
  4. In a large skillet, cook the sausage over high heat until it is lightly browned, about 15 minutes.  Add olive oil if the sausage starts to stick.  Transfer the sausage to a bowl.
  5. Add the fennel seeds, red pepper flakes, onion, fennel, carrot, celery, and garlic to the pan cook until the vegetables are softened and browned, about 10 minutes.  Add olive oil if needed.
  6. Return the sausage to the pan and add the tomato sauce.  If needed, add some water to the pan.  Scrap up any browned bits on the bottom of the pan.  Bring to a simmer and cook for about 30 minutes.
  7. In more boiling water, cook the gnocchi until they again float to the surface.  Transfer the gnocchi to the sauce, toss well, and cook for 1 minute more.
  8. Served topped with grated Pecorino Romano.

Serves 6.

Baked Orecchiette with Pork Sugo

Baked Orecchiete with Pork Sugo

The lack of posts on here is due to the fact that I had to travel to the east coast for work (but I did update my flickr account).  I wanted to make something special for Angela for Sunday dinner but instead I ended up making something that I wanted to (oops).

This recipe appealed to me immediately upon reading it.  Combining pork and pasta, two of my favorite foods, it was like it was written for me.  I had initially hoped to remember to make the recipe sometime in the future when baked things would be desirable but the weather has cooperated and it’s been cool the past several days (or at least since I got back).

This is not something to make on a weekday. In fact, it’s not something to make on an average weekend. It takes a considerable amount of time and effort. And, me being me, I had to find a way to make it more difficult. Replacing canned tomatoes with fresh isn’t that much effort when the tomatoes are readily available but replacing store bought orecchiette with homemade is a bit more serious investment in time and effort. Which was really unintentional but the only orecchiette I could find were $6 for half a pound which is more than I was willing to pay. And I’m not going to figure out exactly what my hourly rate is making homemade orecchiette.

But, luckily for all that effort, this is good.  It’s very good.  It’s good enough that I’m looking forward to eating leftovers for lunch tomorrow (and that’s rare for me even with the best leftovers).  Angela thought it tasted a bit like pot roast (but with pork obviously).  It reminded me a bit of carnitas with pasta.

The pork and pasta marry well together.  The red pepper flakes give just enough heat.  It is very well balanced.  It’s also unlike any other baked pasta dish I’ve had.

Most baked pasta is relatively heavy of cheese and sauce.  The cheese is almost an after thought with this recipe.  The sauce is just the cooking liquid from the braise.  It’s as light as most baked pasta is heavy.  It’s pleasant simply remembering dinner.

And, luckily for me, Angela wasn’t upset that I picked this so I don’t have to sleep on the couch tonight.

Preparing to braise the pork

Baked Orecchiette with Pork Sugo
Adapted from Ethan Stowell via Food & Wine October 2008

3 1/4 lbs. boneless pork shoulder, cut into 1-inch pieces
salt and pepper
3 tbsp olive oil
4 carrots, peeled, cut into 1/4″ dice
4 celery ribs, cut into 1/4″ dice
1 large onion, cut into 1/4″ dice
4 garlic cloves, finely diced
4 tomatoes, peeled, cored, and diced, juice reserved
1 1/2 cups red wine
4 sprigs of thyme
5 cups pork or chicken stock
2 tbsp chopped fresh parsley
1 tbsp chopped fresh oregano
1/2 tsp red pepper flakes
1 1/2 lbs. orecchiette
2 cups grated Parmigiano-Reggiano

  1. Dry the pork on paper towels thoroughly, then season with salt and pepper.
  2. Place the olive oil in a large dutch oven and heat over medium-high heat until just before smoking.  Brown the pork in the olive oil on all sides, about 12 minutes.
  3. Add the carrots, celery, onion, and garlic and cook until softened, about 8 minutes.
  4. Add the tomatoes and the juices and bring to a simmer.
  5. Deglaze the dutch oven with the red wine and add the thyme.  Boil the red wine until it is reduced by half, about 5 minutes.
  6. Add the stock, season to taste with salt, and bring to a boil.  Cover and simmer for 2 hours.
  7. Preheat the oven to 375°F.
  8. Using a slotted spoon, transfer the meat and vegetables to a food processor, discarding the sprigs of thyme.  Pulse the food processor several times until the pork is shredded.  Return the pork and vegetables to the dutch oven.
  9. Stir the parsley, oregano, and red pepper into the dutch oven.  Season to taste with salt and pepper.
  10. Cook the orecchiette in boiling, salted water until they float.  Drain the orecchiete and stir into the dutch oven.
  11. Place the pork-pasta mixture in a large baking dish.  Sprinkle the cheese on top of the mixture evenly.
  12. Bake in the oven for 35 minutes.
  13. Remove from the oven, allow to rest for 15 minutes, then serve immediately.

Serves 8.

Homemade Orecchiette


Homemade Orecchiette
Adapted from
Epicurious

2 cups semolina flour
2 cups all purpose flour
1 cup lukewarm water
salt

  1. In a bowl, mix together the two flours (don’t do this on a work surface, I tried and the water runs all over the place).
  2. Make a well in the center of the flour and add the water and salt.  Using a fork, slowly incorporate the water into the flour.
  3. Once the flour and water are mostly incorporated, pour the bowl contents onto a work surface.  Knead the dough until it comes together and then need for several minutes more.
  4. Cut the dough into 8 even pieces.
  5. For each piece of dough, roll it into a cylinder with a 1/2″ diameter.  Cut the cylinder into pieces 1/2″ wide.  Toss the various pieces with semolina flour then place it in the palm of your hand and press down on it with the thumb of your other hand and twist slightly.  Place the orecchietta on a baking sheet dusted with semolina.

Makes 1 1/2 lbs.

Mock Porchetta

Mock Porchetta Served

Ever since I had heard of porchetta, I have lusted after it. A whole pig stuffed with garlic, herbs, and other seasonings? Yes, please! It’s almost like an Italian version of barbeque.

Despite my pretensions, there’s no way I’m going to cook a whole pig, particularly in my small apartment kitchen. I don’t think it would fit in my oven for one.

Mock Porchetta Cooking

This isn’t a real porchetta. Given I have no baseline for real porchetta, I don’t even know how it compares. It is, however, good and I think it might be a good approximation.

I waited to make this until I had a “special occasion” (a.k.a. when it would be more than just Angela and I for dinner). The opportunity presented itself when my parents came to visit.

This is actually a great meal to make when having company. While it takes a long time to cook (and does require advanced preparation), it requires little in the way of real work. Most of the cooking is done unattended and only needs to be checked on once every hour or so. Having a whole meal in one dish doesn’t hurt.

The only proof you should need that the mock porchetta is good is that my mother asked for a copy of the recipe.

I served the mock porchetta with a homemade baguette and a bottle of 2004 Dopff & Irion Riesling Schoenenbourg. Dessert was homemade orange ice cream.

Mock Porchetta seasoned and tied

Mock Porchetta
Adapted from The Zuni Cafe Cookbook: A Compendium of Recipes and Cooking Lessons from San Francisco’s Beloved Restaurant

1 2-1/2 to 3 lbs. pork butt roast
salt
1 tbsp capers, rinse, soaked, dried and chopped
1 tsp chopped lemon zest
3 garlic cloves, coarsley chopped
12 fresh sage leaves, crushed and chopped
2 sprigs rosemary, leaves stripped and chopped
2 tsp fennel seeds, crushed
1 1/2 tsp ground black pepper
2 lbs. peeled and sliced potatoes, carrots, and red onions
olive oil
2/3 cup pork stock or chicken stock
2 tbsp dry vermouth

  1. In a bowl, combine the capers, lemon zest, garlic, herbs, fennel seeds, and pepper in a small bowl. Mix well.
  2. Trim all but 1/4″ of fat off the sides of the pork butt. Cut into the pork butt to open up as much surface area as possible while only opening up natural seams in the meat. (If you use a portion near the bone, the natural pocket left by the bone may suffice for this portion).
  3. Season the inside of the pork with salt evenly. Rub the herb mixture all over the inside of the pork. Season the outside of the pork.
  4. Tie the pork to form a uniform shape.
  5. Cover the pork and allow to sit in the refrigerator for 1 to 3 days.
  6. Remove the pork an hour before cooking to allow it to come to room temperature.
  7. Preheat the oven to 350°F.
  8. Toss the vegetables in a minimum of olive oil, so that they are barely coated. Season with a few pinches of salt.
  9. Heat a dutch oven over medium heat until hot. Add the pork roast and surround with the vegetables.
  10. Place in the oven and bake for 1 hour.
  11. After an hour, turn over the meat and rotate the vegetables.
  12. Bake for 1 hour more.
  13. Add 1/3 cup of the stock, return to the oven, and bake for 15 to 30 minutes more, to 185°F.
  14. Remove from the oven. Remove the pork and vegetables, cover with aluminum foil.
  15. Deglaze the dutch oven with the vermouth and remaining stock. Bring to a simmer and scrape any browned bits off the bottom of the pan. Simmer to reduce the sauce slightly.
  16. Slice the pork and serve garnished with the vegetables and sauce.

Serves 4 to 6.

Garlic-Sage-Brined Pork Chops

I think they may taste better than they look

Pork chops get a bad wrap. They’re not nearly as tender as the pork tenderloin but they end up just as dry and flavorless. They’re are few things worse than eating a dry, tough, flavorless piece of meat.

But, really, pork chops should be drool worthy. It’s like a steak but it’s pork so it should be even better. I always want to love pork chops but it seldom works out (witness the distinct lack of pork chop recipes on here).

I’ve tried brining before but it didn’t help all that much. It was too easy to overpower the flavor of the pork (ever had a pork chop that tasted entirely of herbs? I have). And all the brine recipes wanted to make apple-flavored pork chops. I don’t have a problem with apple flavorings in pork per se but it really wasn’t what I was looking for.

I now have an Angela-approved pork chop recipe to put on the do-over list (i.e. things that get made again). The sage and garlic flavors are mild and accentuate the pork as opposed to overpower it. The pork wasn’t dry or overly salty. And while I wouldn’t describe the pork as tender, it definitely wasn’t tough. The pork chops achieved the level of balance that’s often missing in food.

The sauce is of my own invention and is completely optional. I liked it, Angela didn’t use any. It’s just a basic pan sauce with shallots and pork stock. I added a little dijon mustard to round out the flavor.

These went particularly well with creamed corn (of course, few things don’t go well with creamed corn).

Brining away...

Garlic-Sage-Brined Pork Chops
Adapted from Charcuterie: The Craft of Salting, Smoking, and Curing

Brine:
1 quart of water
1/4 cup kosher salt
6 tbsp packed dark brown sugar
2 packed tbsp sage leaves
1/2 tbsp juniper berries, crushed
1 garlic clove, crushed
1/2 tbsp ground black pepper

Two 3/4″ thick bone-in pork rib chops
2 tbsp pork fat (or vegetable oil)
1 tbsp diced shallots
1 tsp dijon mustard
1/2 cup pork stock (or water)
1 tbsp butter, softened

  1. Combine all the brine ingredients in a large pot and bring to a simmer, stirring to dissolve the salt and sugar. Remove from the heat and allow to cool to room temperature. Place the brine in the refrigerator until it has chilled.
  2. Add the pork chops to the brine and refrigerate for 2 hours. Remove the pork chops from the brine and refrigerate at least 1 hour or up to a day.
  3. A half hour before cooking, remove the pork chops from the refrigerator.
  4. In a skillet over high heat, melt the pork fat until hot. Sear the pork chops on each side until well browned, about 5 minutes per side or until the pork reaches an internal temperature 140ºF.
  5. Remove the pork chops from the skillet and cover with aluminum foil.
  6. Reduce the heat to medium and add the shallots. Cook for 1 minute or until the shallots are softened.
  7. Stir in the dijon mustard then deglaze the pan with the pork stock. Bring to a boil and reduce until slightly thickened.
  8. Remove from the heat and stir in the softened butter.
  9. Serve the pork chop covered with the sauce.

Serves 2.

Mao Shi Hong Shao Rou (Chairman Mao’s Red-Braised Pork)

CRW_1451

There’s something about this dish that just seems, well, un-American. First of all, it’s Chinese. But even more so, it’s associated with that despicable character Chairman Mao. And it’s red-braised pork. It’s even Communist in the name!

Luckily, I’m not actually Joe McCarthy and I don’t care about those things. What I do care about is whether or not it tastes good.

This is one of those foods that can only be described as tasting interesting. Interesting can be code for both good and bad but in this case it just means different. Caramelized sugar isn’t frequently encountered in savory dishes in the west. Neither is cinnamon. I’m also not particularly used to meat that’s quite as fatty as pork belly.

CRW_1443

None of these things make the dish bad, just different. And, in this case, different really is good. I don’t like it as much as Chairman Mao did but I wouldn’t mind having it on occasion.

I was intrigued by the texture difference between the fat and meat but Angela wasn’t such a big fan of that. I’d probably consider making it with pork butt in the future simply to alleviate her concerns. I’d also consider thickening the sauce at the end with a corn starch-water slurry as it never really became thickened and I think that the sauce might be better that way. It probably wouldn’t be authentic but I think I’m okay with that.

I also noticed a lot of scum coming to the surface as it was braising. I think the first simmering is supposed to remove the scum from the meat but didn’t for whatever reason. I just skimmed the surface of the scum and went on with it.

This pairs quite well with plain white rice as well as a stir-fried vegetable. I did button mushrooms with a bit of ginger which was good if not particularly Chinese.

CRW_1446

Mao Shi Hong Shao Rou (Chairman Mao’s Red-Braised Pork)
Adapted from Revolutionary Chinese Cookbook: Recipes from Hunan Province

1 lb. pork belly, skinless
2 tbsp vegetable oil
2 tbsp sugar
1 tbsp Shaoxing wine
a 3/4″ piece of ginger, skin left on, sliced
1 star anise
2 dried red chilies
1 small cinnamon stick
light soy sauce
salt
sugar
scallion greens from 2 scallions, sliced

  1. Bring a pan filled with enough water to cover the pork belly to the boil. Plunge the pork belly into the water and simmer for 3 to 4 minutes. Remove the pork belly from the water and discard the water.
  2. When the pork belly has cooled enough to handle, cut the pork belly into bite-sized pieces.
  3. Heat the oil with the sugar in a wok over medium-low heat until the sugar melts. Raise the heat and stir regularly into the sugar caramelizes.
  4. Add the pork and Shaoxing wine. Add enough water to cover the pork and add the ginger, star anise, chilies, and cinnamon stick. Simmer for 40 to 50 minutes, skimming any scum off the surface.
  5. At the end of the cooking period, increase the heat to reduce the sauce. Season the sauce to taste with the light soy sauce, salt, and sugar.
  6. Serve the pork covered with the sauce and sprinkled with the scallion greens.

Serves 4.

Sweet and Sour Pineapple Pork

CRW_0821


The first Chinese dish (outside of fried rice) that I really decided that I like was sweet and sour chicken. Given my upbringing, this was at one of the ubiquitous “Chinese” fast-food restaurants at a mall. Given I was child at the time, I can’t really blame myself for it.

Sweet and sour chicken has to be one of the least offensive “foreign” foods ever (I’m guessing it’s about as American as apple pie but it’s still somewhat exotic for middle-America). It’s chicken (outside of Peta members, is there anyone who finds chicken objectionable?) which has been deep-fried (which has to be the most all-American way of cooking something) served in a sweet sauce (and where would Americans be without sugar corn syrup). So it’s not particularly surprising that I liked it.

And I’ve actually had good renditions of it. It’s just usually overly thick and overly sweet. And there’s more breading than chicken. And the pieces are too big to be edible with chop sticks. And it just ends up dissappointing.

I’ve even tried to make it myself (with a variety of recipes). And I’ve never come up with something that I can actually say is good. Sure, the chicken is alright but the sauce never works out.

CRW_0817


When I came across this recipe, I was naturally skeptical. How good could any Chinese recipe be that included ketchup? (Of course, the Chinese may have invented ketchup.) And there’s a lot of sugar in it. And given my previous attempts, why won’t the sauce be overly thick or sweet?

I figured I’d give it a shot. And it was good. Very good. The pork actually has flavor as opposed to simply providing a vehicle to eat the sauce. And the sauce wasn’t too thick. It coated the pork well without being too thick. And it was actually sweet and sour. It was much better than any fast food Chinese.

But I still have a place in my heat for sweet and sour chicken.

CRW_0818


Sweet and Sour Pineapple Pork
Adapted from The Key to Chinese Cooking

1 lbs pork tenderloin
4 cups oil
1/4 cup cornstarch mixed 1/4 cup all purpose flour

Marinade:
1/2 tsp salt
2 tsp light soy sauce
1 tsp sesame oil
1 tbsp cornstarch dissolved in 1 tbsp water
1 egg yolk, beaten

Sauce:
5 tbsp sugar
1/2 tsp salt
4 tbsp white vinegar
3 tbsp light soy sauce
2 tbsp Shaoxing wine
3 tbsp ketchup
2 tbsp oil
1 garlic clove, crushed and peeled
1 tbsp cornstarch dissolved in 3 tbsp water
1 tbsp sesame oil
1/2 cup water
1 cup canned cubed pineapple

  1. Trim the meat of excess fat and any silver skin. Pound the meat with a meat tenderizer to separate the muscle fibers. Cut it lengthwise into 1 inch wide stripes and then crosswise into 1 inch cubes.
  2. Combine the marinade ingredients together and mix well. Place the pork in the marinade, stir well, and allow to marinade for at least 30 minutes.
  3. Mix together the sugar, salt, white vinegar, soy sauce, wine, and ketchup for the sauce.
  4. In a sauce pan, heat 2 tbsp oil over high heat until hot. Add the garlic and cook briefly, turning the garlic several times.
  5. Add the mixed sauce ingredients and stir until it comes to a boil.
  6. Reduce the heat to low and add in the cornstarch mixture stirring until it begins to thicken.
  7. Add the water and stir until the sauce becomes smooth and thickened. Remove from heat and discard the garlic.
  8. Heat the oil in a wok until hot, about 350ºF.
  9. Dredge the pork in the cornstarch-flour mixture and shake off any excess flour.
  10. Place the pork in the oil and cook for 3 minutes, stirring constantly. Remove the pork from the oil and drain on paper towels.
  11. Return the oil to 350ºF. Return the pork to the oil and cook for 2 minutes until the pork is crisp and browned.
  12. Return the sauce to a simmer and add the pineapple. Simmer for 30 seconds.
  13. Remove the pork from the oil and place in the sauce after draining briefly.
  14. Place the sauce over high heat and stir until the pork is well coated.
  15. Serve immediately with white rice.

Serves 2-3.