Posts Tagged 'Charcuterie'

Homemade Guanciale

Diced homemade guanciale

Our recent move necessitated the use or disposal of any perishables.  Since that time, I’ve been missing my cured meats the most.  Luckily, we’ve been able to find some good bacon in Virginia. However, I have yet to find any thing as good as my homemade pancetta.

I have, however, made friends with a local pork farmer who comes to the Alexandria Farmer’s Market.  As a side note, his pork is very very good.  So far, I’ve only managed to get one pork belly from him (most are preordered by restaurants, mine has been turned into pancetta) but the real surprise for me was that he regularly sells pork jowls.  I’ve been to quite a few specialty markets, butchers, and Asian groceries and not once have I seen pork jowls for sale.

Homemade pancetta and guanciale drying

To me, the real coup with finding pork jowls is that I can turn them into guanciale (another hard to find product in the United States).  And my desire for guanciale is simply that it is the authentic ingredient in probably my most favorite pasta dish (and quite likely favorite food), spaghetti alla carbonara.

The most difficult part of making guanciale is finding a pork jowl.  It’s cured simply with just salt and a few seasonings.  Then it’s hung to dry.  My choice of hanging spot was in our unheated sun room.  The temperature was pretty close to right (50ºF to 60ºF) and seemed to have a pretty good humidity.  The only possible mistake I made was hanging it by a window as a pork jowl is mostly fat and light can damage fat.  I’ll have to return my drying to a mini-fridge in the future.

Until I had to go without, I didn’t realize how central cured meats like guanciale or pancetta are to my cooking. I like to keep some in the fridge to make quick, but good, pastas.  It’s an effective way to add some protein to a meal or to modify a side dish into being a complete meal.

Along with spaghetti alla carbonara, it is also traditionally used in bucattini all amatriciana.

Spaghetti alla Carbonara made with home guanciale

Homemade Guanciale
Adapted from Charcuterie: The Craft of Salting, Smoking, and Curing

One 2-lbs/1-kg pork jowl

Dry Cure:
70 g kosher salt
70 g sugar
10 g garlic, mashed
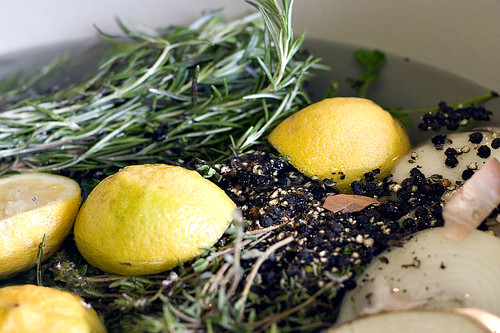
15 black pepper corns, cracked
1 large bunch thyme

  1. Rinse and pat the jowl dry.  Trim any stray tissue, glands, or hairs from the jowl.
  2. Combine the dry cure ingredients in a bowl and mix thoroughly.
  3. Place the jowl into a large zip-top bag and rub with the dry cure on both sides.  Refrigerate for 4 to 6 days, until it feels stiff all the way through.  Overhaul the cure by redistributing the cure and turning the jowl over every other day.
  4. Remove the jowl from the bag and rinse off all the cure.  Dry thoroughly.
  5. Poke a hole in the corner of the jowl with a knife.  Run a piece of butcher’s string through the hole.  Hang the jowl in a cool, dry place for 1 to 3 weeks, until it is stiff but not hard.
  6. Refrigerate for up to 3 weeks or freeze for several months.

Herb-Brined Roast Chicken

It's surprisingly difficult to photograph a roast chicken

Currently, whenever I think of roast chicken, I think of the roast chicken I shared with friends, in the rain, in Versailles, France. We had just taken the train in from Paris to visit the eponymous Château. We were hungry and our guide book directed us to the local farmer’s market. We eventually settled on a roast chicken and a loaf of bread. We huddled under an archway and, after the first couple bites, literally tore the chicken apart. I don’t know if it was the setting, the company, or if the chicken was as good as I remember, but it was the best roast chicken I may have ever had.

But, really, is there a need for yet-another-roast-chicken recipe out there? Has there ever been a cookbook published without one? Hyperbole aside, there certainly are enough out there. I’ve even posted one.

So why another one? Well, I originally used this brine for a turkey at Thanksgiving (if you wish to do so, increase the brine time to 24 hours). The turkey turned out excellently so I thought I’d apply to a chicken in the future.

And here we are then. I had a craving for roast chicken and I decided to share it with the rest of the world (or the limited portion of it that reads this blog).

The brine is not for the faint of heart (or pocketbook). I’m half convinced I spent more on the brine than on the chicken (and it was an organic chicken!). I wouldn’t use this as an everyday brine but it works well for special occasions. I plan to use the brine again next Thanksgiving.

For some reason, I feel like I'm wasting everything that goes into the brine

Herb-Brined Roast Chicken
Adapted from Charcuterie: The Craft of Salting, Smoking, and Curing

Brine:
1 gallon water
1 cup kosher salt
1/2 cup sugar
1 bunch fresh thyme
1 bunch fresh rosemary
1 bunch fresh parsley
2 bay leaves
1 head garlic, cut in half horizontally
1 onion, sliced
3 tbsp black peppercorns, crushed
2 lemons, halved

1 whole 3-to-4 lbs. chicken

  1. Combine all the brine ingredients in a large pot; squeeze the lemons as they are added. Bring to a simmer over high heat to dissolve the salt and sugar. Remove from the heat. Allow to cool to room temperature and then refrigerate until chilled.
  2. Add the chicken to the brine and weigh it down with a plate to keep it submerged. Allow to brine for 8 to 12 hours.
  3. Remove the chicken from the brine, rinse well, and dry with paper towels. Let it rest in the refrigerator for 24 hours.
  4. Remove the chicken from the refrigerator an hour before cooking.
  5. Preheat the oven to 450ºF.
  6. Roast the chicken in a roasting tray until it reaches an internal temperature of 160ºF. Remove from the oven and allow to rest for 15 minutes.
  7. Serve immediately.

Serves 3 to 4.

Hot Italian Sausage

CRW_1412

Sausage has a reputation as a pedestrian food. You eat it at a cook out, at a baseball game, or while camping. It’s something you eat to satiate your hunger, not because it’s good.

But why can’t sausage, in the words of Rodney Dangerfield, get no respect? When it’s good, it should. Most are based around pork with enough added fat that it isn’t dry. And you can do things with seasonings in a sausage that just wouldn’t work in a whole cut of meat.

CRW_1373

If you can’t tell, I rather like sausages. But every since I realized that some sausages from the grocery store contained high fructose corn syrup, I’ve decided to stick with the homemade variety. It doesn’t hurt that they taste significantly better. It’s also particularly rewarding to cook up a sausage and realize that you made it.

CRW_1390

While I tend to like authentic ethnic recipes whenever possible, this is much more Italian-American than Italian. I’m going to let it slide as it’s pretty tasty. When I make it again, I’d probably use less (or possibly no) coriander seeds. It dominates the flavor a bit too much for my taste. It’s particularly good when sautéed and served with good Dijon mustard and grilled onions.

CRW_1425

Hot Italian Sausage
Adapted from Charcuterie: The Craft of Salting, Smoking, and Curing

2 kg boneless pork shoulder, cut into 1 1/2″ cubes
225 grams pork belly, cut into 1 1/2″ cubes
100 grams pancetta, cut into 1 1/2″ cubes (optional)
40 grams kosher salt
32 grams sugar
16 grams fennel seeds, toasted
8 gram coriander seeds, toasted
16 grams smoked Spanish paprika
1/2 tsp cayenne pepper
24 grams fresh oregano leaves, chopped
24 grams fresh basil leaves, chopped
12 grams red pepper flakes
6 grams coarsely ground black pepper
3/4 cups ice water, chilled
1/4 cup red wine vinegar, chilled
10 feet hog casings

  1. Combine all ingredients except water, vinegar, and casings in a large bowl. Toss to distribute the seasonings evenly. Cover and refrigerate overnight.
  2. Place the hog casings in a bowl of water and refrigerate overnight.
  3. Several hours before grinding, place the food grinder, mixer bowl, paddle attachment, and any other attachments in the freezer.
  4. Remove the meat mixture from the refrigerator and place in a bowl of ice and salt. Grind the mixture through the small die into the mixer bowl set in a bowl of ice and salt.
  5. Add the water and vinegar to the mixture. Beat the mixture with the paddle attachment on medium speed for 1 minute. Mix until the mixture is uniform. Refrigerate the bowl until ready to stuff.
  6. Sauté a small portion of the sausage in a small bit of oil and taste for seasoning.
  7. Remove the hog casings from the refrigerator and rinse both the inside and outside of the casings in running water.
  8. Setup the sausage stuffer using the largest stuffing attachment. Place meat in the sausage stuffer and turn on to low speed until the meat is just at the end of the attachment. Slide the opening in the casing onto the stuffer and then push the remaining casing onto the stuffer until there is about an inch hanging off. Tie off the end of the casings. Slowly push the meat mixture into the sausage stuffer while holding the casing and letting the meat fill it (this is a two person job). The speed is determined by the speed of the meat being putting into the stuffer not the speed of the mixer. When there is no more casing, tie it off and repeat this step with the remaining casing.
  9. Twist the sausage into 6 inch long segments and cut with shears.
  10. Cook the sausage to an internal temperature of 150ºF.

Makes 5 lbs. of sausage.


Flickr Photos