Posts Tagged 'Recipe'

Fettucini with Ramps and Asparagus

Fettucini with Asparagus and Ramps

If you’ve read this blog before, it becomes readily apparent that I’m not a vegetable-centric cook.  But after a long winter where the only vegetables at the farmer’s market were lettuces and carrots, the arrival of asparagus, ramps, and tomatoes yesterday really got me excited.  The sign at Westmoreland Berry Farm’s stand announcing that there would be strawberries in two weeks didn’t hurt.

While running errands later in the day, all I could think about was what exactly I’d do with my vegetable bounty. I settled pretty quickly on pasta but the details were still a mystery. I contemplated using pancetta or bacon. Then I wondered if I should add cream or cheese.

In the end, I went for the route of simple.  No pork products.  No cream.  No cheese.  Just saute the vegetables in butter and use the pasta water as a sauce.

It’s amazing what such a simple sauce can provide in flavor.  In a word, it tasted like spring.  The pasta absorbed the flavor of the asparagus and ramps and tasted nearly perfect.  The flavor was mild such that anything richer or heavier, like bacon or cream, would’ve over powered it.

Ramps and Asparagus

Fettucini with Ramps and Asparagus

6 large stalks of asparagus
8 oz. ramps
3 tbsp of butter, divided
salt and pepper
1 large shallot, diced
fresh pasta made with 2 cups of flour and 2 eggs

  1. Break the bottom off the asparagus and discard the bottom.  Use a vegetable peeler to remove the skin on the bottom portion of the asparagus.  Cut the asparagus into 1″ pieces.
  2. Clean the ramps.  Separate the leaves from the white parts of the ramps.  Tear the leaves into 1″ pieces.
  3. Heat 2 tbsp of butter over medium heat in a large skillet.  Add the asparagus and white part of the ramps.  Season with salt and pepper.  Cook, stirring regularly, until the asparagus and ramps begin to brown, 2 to 3 minutes.
  4. Add the shallots and cook for a minute more.
  5. Add the ramp leaves, season with salt, and cook until the ramp leaves are wilted.
  6. Meanwhile, cook the pasta in salted boiling water until slightly undercooked.  Drain the pasta, reserving the cooking water.
  7. Add the pasta to the skillet.  Add 1/2 cup reserved pasta water to the skillet.  Increase the heat to medium-high and cook until the pasta water is mostly absorbed and the rest is thickened.
  8. Remove from the heat and add the remaining 1 tbsp of butter.  Stir until the butter is incorporated into the pasta.
  9. Serve immediately.

Serves 2.

Homemade Smoked Bacon

Homemade Smoked Bacon
I don’t think I can compete with the superlatives bestowed upon bacon on the internet.  My love of bacon is not as great as that professed on some sites.  I don’t find the idea of chocolate covered bacon appetizing.  I don’t even like bacon a cheeseburger.  To be honest, I rarely eat bacon by itself.  Bacon has, however, become an integral part of my cooking as an ingredient.

One of the advantages of moving to Virginia is that there is a history of smoking in the state and, therefore, there are good local bacons available.  Those at the farmer’s market are even better. In California, I even made fresh (unsmoked) bacon. When I saw a pork belly at EcoFriendly Foods stand several weeks ago, I knew it was time to try smoked bacon again.

This isn’t my first try at smoked bacon.  My first attempt used a maple syrup based cure and the bacon was oddly sweet.  My next attempt was a more savory cure based on a pancetta recipe.  This bacon is a refinement of the second attempt.

While it may be self-aggrandizing, this is the best bacon I’ve tasted.  The cure ingredients only serve to enhance and complement the natural pork flavor as does the smoke.  It’s almost too flavorful to eat by itself.  Almost.  But that makes it even better when it’s used as an ingredient.

Smoked Bacon
Adapted from Charcuterie: The Craft of Salting, Smoking, and Curing

One 5 lbs. (2.25 kg) pork belly, skin on

Dry Cure:
4 garlic cloves, minced
12 g pink salt
50 g kosher salt
26 g light brown sugar
20 g coarsely ground black pepper
10 g crushed juniper berries
4 bay leaves, crumbled
5 sprigs of thyme, leaves only
4 sprigs of rosemary, leaves only
3 dried red chili peppers, crumbled

  1. Combine the cure ingredients in a bowl and mix well.  Place the belly in a jumbo Ziploc bag or other large container.  Spread the cure mixture on all sides of the pork belly.
  2. Refrigerate the pork belly for 7 to 10 days, overhauling the pork belly by turning it over every other day, until it is firm at its thickest point.
  3. Remove the pork belly from the refrigerator, rinse the pork belly, dry it with paper towels, then allow it to dry in the refrigerator overnight on a rack.
  4. Hot smoke the pork belly over hickory until it reaches an internal temperature of 150ºF, 2 to 3 hours.
  5. Allow the pork belly to cool to room temperature, then chill in the refrigerator.
  6. Cut into thick slices.
  7. The bacon can be refrigerated for several weeks or frozen nearly indefinitely.

Yields approximately 4 lbs/1.75 kg bacon.

Maple Cake with Maple Syrup Frosting

Maple Cake with Maple Syrup Frosting

The last two times we’ve gone skiing in Vermont, my non-skiing wife insisted that we take at least one day and go exploring.  For us, exploring consists of visiting cheese makers, ice cream makers, a brewery, and, of course, maple syrup producers.  It was an interesting experience visiting several different producers, trying the different grades, and then tasting the differences between different areas and producers.  Similar to wine, the terroir makes a difference.

After our last trip, we come home laden with more maple syrup, even though we had an unfinished bottle in the fridge from our previous trip.  With so much maple syrup in our house, when I first read the title of this recipe in Bon Appetit, I knew I had to make it.

I made it when we had planned to have several guests.  Instead, only Alison decided to join us.  So that meant a lot of cake for me to eat for breakfast and lunch during the week, even after we sent Alison home with some of the leftovers.

Surprisingly, given the article that this recipe was part of, this is not a typical cake.  It’s sweetness is muted.  The cake itself is subdued in flavor while the icing provides a good counterpoint with the dark maple flavor and the tangyness of the cream cheese.

This isn’t a particularly difficult recipe but I did have problems getting the maple syrup to mix with the butter and shortening in a smooth fashion.  I beat it until the fat particles were relatively small and, in the end, I don’t think it made much of a difference.  The original recipe calls for walnuts in the cake and in the frosting, but I omitted them because of Angela’s preferences.

Maple Cake with Maple Syrup Frosting
Adapted from Bon Appetit April 2010

Cake:
3 cups all purpose flour
1 tbsp baking power
1 tsp salt
1/2 cup unsalted butter, softened, cut into 1 tbsp chunks
2 tbsp vegetable shortening, softened
2 cups Grade B maple syrup
3 egg yolks
1 egg
1 1/4 cups whole milk

Frosting:
8-oz. cream cheese, softened
1/2 cup unsalted butter, softened, cut into 1 tbsp chunks
3 cups powdered sugar
2 tbsp Grade B maple syrup

  1. Preheat the oven to 325ºF.
  2. Butter and flour two 8″ cake pans.
  3. Combine the flour, baking powder, and salt in a bowl and whisk to combine.
  4. In an electric mixer, beat the butter and shortening until creamy and fluffy.
  5. Add the maple syrup and beat until the mixture is smooth, 3 to 5 minutes.
  6. Add the egg yolks and the egg one at a time, pausing until the mixture is well combined before adding the next one.
  7. Beat in the flour in 3 additions, alternating with the milk.
  8. Divide the batter evenly between the two pans.
  9. Bake for 50 to 55 minutes.
  10. Remove from the oven, allow to cool, then remove from the cake pans.
  11. To make the frosting, beat cream cheese and butter until smooth.  Add the powdered sugar and maple syrup and beat until just combined.
  12. Make a layer cake, by icing the cake with the frosting.

Serves 10.

Chicken Teriyaki

Chicken Teriyaki

Upon arriving home from work today, there was a pair of chicken quarters starring at me from the refrigerator accusingly.  My original plan was to grill the chicken but, despite the very obvious heralds of Spring, my plan was thwarted by the appearance of rain.  While sitting on an endless conference call at work today, I contemplated my predicament.  And, from some recess of my brain, came the idea of chicken teriyaki.

My experience with cooking Japanese food is basically non-existent.  To me, Japanese food is intimidating.  It is not only rooted in alien and unfamiliar techniques, it is also known for its simplicity and attention to detail.  It is not only outside my comfort zone, it also has the reputation, to me at least, of being exacting and requiring skill to pull off correctly.

Despite my preconceived fears, this is a very simple recipe.  The hardest part is probably the shopping but sake and mirin are commonplace anymore.  While the ingredients are fairly simple, the outcome is definitely more than the sum of its parts.  But it’s also self-evident that the quality of the ingredients is paramount.  Good chicken, pasture raised, preferably from a small farmer or farmer’s market (as mine was) will elevate this dish from the pedestrian to the sublime. And, while I’m no expert on Japanese food, that is the exact impression I’ve always gathered from it.

Chicken Teriyaki
Adapted from The Best Recipes in the World

4 bone-in chicken quarters
2 tbsp water
1/3 cup sake
1/3 cup mirin
2 tbsp sugar
1/3 cup soy sauce

  1. Pre-heat a large skillet over medium-high heat.  Add the chicken, and cook for 15-20 minutes, turning as needed, until the chicken is mostly cooked (to an internal temperature of approximately 150°F).
  2. Remove the chicken from the skillet.
  3. Reduce the heat to medium.  Deglaze the pan with the water.  Add the sake, mirin, sugar, and soy sauce.
  4. When the sauce begins to bubble, return the chicken to the skillet.  Cook, turning the chicken in the skillet, until the sauce becomes almost a glaze and the chicken is well coated.
  5. Serve immediately with sticky rice.

Serves 4.

Fried Oysters

Fried Oysters

In honor of health care reform passing last night, I thought we should eat some fried foods.  That may be the best form of socializing risks that I know of.

In reality, I had bought some shucked oysters at the farmer’s market and had already been planning to fry them.  We’ve been lucky that a seafood vendor has been attending the farmer’s market.  Initially, they had only agreed to attend during the winter.  Given the quality of their products (particularly, the rock fish), to encourage them to continue attending as well as to eat more seafood, I decided to try and buy at least one thing from them every week.  Last week was clam chowder. This week, at Angela’s encouragement, was fried oysters.

Despite being from and currently living in the Chesapeake Bay area, I’ve had little experience with oysters.  My parents don’t like them (or at least think they don’t), so I never ate them growing up.  My first experience with them was at a local restaurant; from there, I was hooked. Angela’s obsession started after eating a fried oyster topped burger in Boston.

I also must admit that the recipe I use for frying oysters comes from a New Englander. In my defense, my lack of Chesapeake Bay cookbooks not withstanding, it’s really quite good. It’s also said to be a “southern style” fry mix. And while most Marylanders would probably put Old Bay on the oysters, it would probably overpower the mild taste of the sweet oysters I’ve been buying.

I like to serve fried oysters with french fries.  If I’m taking the time to start deep frying, I might as well make some french fries while I’m at it.  Plus, it makes a convenient “one pot” meal.  If you want to make french fries, I’d suggest cooking them before the oysters.  The oysters cook very quickly and can add odd flavors to the french fries.

For the dredge, don’t use a very coarse cornmeal (i.e. polenta); it will make the oysters too gritty.  However, I would recommend a stone-ground cornmeal if at all possible.

For the frying, I like to setup two half-sheet pans, each with a cooling rack on top.  One sheet pan gets the dredged but uncooked oysters.  The other sheet pan can be used to rest the cooked oysters.

Homemade French Fries

Fried Oysters
Adapted from The Summer Shack Cookbook: The Complete Guide to Shore Food

1 half-pint shucked oysters
2 cups buttermilk
4-6 cups peanut oil or enough to deep fry

Dredge:
1 1/4 cup all-purpose flour
3/4 cup cornmeal
1 1/2 tsp lemon zest
1/2 tsp dried thyme
1 tsp ground black pepper
1/4 tsp cayenne pepper
1/4 tsp kosher salt

  1. Heat the oil in a large dutch oven to 360°F.
  2. In a bowl, put the buttermilk.  In another bowl, mix together the dredge ingredients.  Dredge each oyster, first through the buttermilk, then through the dry ingredients.  Set aside.
  3. Deep fry the oysters at 360°F until they are lightly browned and cooked through.  Initially, the oil will boil very heavily, when the oil subsides and boils lightly, the oysters are done (the change is distinct).
  4. Remove from the oysters from the deep fryer and allow to drain for a minute.  Season the oysters with salt.
  5. Serve immediately with cocktail sauce.

Serves 2-3.

Cocktail Sauce
Adapted from The Summer Shack Cookbook: The Complete Guide to Shore Food

12 oz. Heinz chili sauce
1 tbsp prepared horseradish
1/2 tsp Worchestershire sauce
1 1/2 tsp lemon juice
pinch of salt

  1. Mix all ingredients well.

Camarones a la Vinagreta (Shrimp with Lime Dressing)

Camarones a la Vinagreta (Shrimp with Lime Dressing)
Last Saturday, we had a party where we served Mexican food.  I even invested in a tortilla press and tried my hand at making fresh tortillas.  Unfortunately, despite my best efforts to prepare in advance, I was too busy and too tired to take pictures to generate a blog post.

But armed with a new tortilla maker and some left over ingredients, I wanted to try to make more Mexican food.  I haven’t made a lot of Mexican food previously.  When we lived in California, Mexican food was omnipresent.  They even served passable tacos at the corporate cafeteria.  In northern Virginia, good tacos are few and far between.

Given that there were shrimp in the freezer, shrimp tacos seemed a wise choice.  These tacos are very easy to make.  The cooking of the shrimp is somewhat unconventional but it does work.  Given the flavoring of the tacos, they would be just as good, if not better, served either at room temperature or chilled on a hot day.

Camarones a la Vinagreta (Shrimp with Lime Dressing)
Adapted from Authentic Mexican 20th Anniversary Ed: Regional Cooking from the Heart of Mexico

For the shrimp:
1 quart water
1 lime, halved
1/2 tsp ground black pepper
1/4 tsp ground allspice
3 bay leaves
12 oz. shell-on shrimp

For the dressing:

1/2 small red onion, coarsely diced
1 medium tomato, cored and diced
1 1/2 tbsp dice cilantro
2 1/2 tbsp lime juice
3 tbsp olive oil
2 tbsp vegetable oil
salt

  1. In a sauce pan, combine the water, black pepper, allspice, and bay leaves.  Squeeze the limes and add them to the sauce pan.  Bring to a simmer, cover, and simmer for 10 minutes.
  2. Uncover the sauce pan, turn the heat to high, add the shrimp, cover, and bring to a boil.
  3. Remove the sauce pan from the heat and drain off the liquid.  Keep the pan covered and set aside for 15 minutes.
  4. Peel the shrimp and cut them into 1/2″ pieces.
  5. Combine the red onion, tomato, and cilantro in a bow with the shrimp.
  6. Whisk together the lime juice, olive oil, and vegetable oil.  Pour over the shrimp mixture.
  7. Serve the shrimp mixture in tortillas.

Serves 2-3.

New England Clam Chowder

New England Clam Chowder

It has been raining on and off since Friday.  Yesterday, when I went to the farmer’s market, it was more on than off.  As I was driving there and the rain started to let up, I was hopeful that my shopping would end up being dry; I was wrong.  With the raining come down as I stood half covered by the awning of the seafood vendor, I decided that the only appropriate option would be clam chowder.

I’m not from New England.  I’ve only been there a handful of times and I’ve never eaten clam chowder there.  Previously, clam chowder was a bland, generic milky soup that either came out of a can or was served at a generic restaurant.

Despite all the bad versions I’ve had, the Platonic ideal of New England clam chowder has always appealed to me.  Somewhere, there was a creamy but flavorful soup that actually tasted of clams.

This may not be the form of the perfect clam chowder but it’s still quite good.  I’ve made this recipe a few times now and it’s always worked out for me.  The original doesn’t include any cayenne pepper or Tabasco but they both help to cut through the brinyness of the clams while not overpowering the flavor of the clams.

On this rainy, chilly night, clam chowder matched the mood.  With a sliced baguette to sop up the  broth, it was nearly perfect.

New England Clam Chowder
Adapted from The Summer Shack Cookbook: The Complete Guide to Shore Food

1 tbsp unsalted butter
3 or 4 slices of bacon, cut into lardons
1 yellow onion, diced
2 garlic gloves, diced
2 stalks of celery, sliced
12 sprigs of thyme, leaves removed and diced, divided
1 bay leaf
salt
1 lbs. Yukon Gold potatoes, peeled and cut into 1/2″ pieces
1 pint of shucked clams, drained, juice reserved
12 fluid oz. clam juice
1.5 cups heavy cream
black pepper
cayenne pepper
Tabasco

  1. Melt the butter over medium heat in a large dutch oven.  Add the bacon and cook until well browned and the fat rendered from the bacon.  Remove the bacon and drain on paper towels.
  2. Add the onion, garlic, half the thyme, and celery to the dutch oven.  Season with a pinch of salt and book until the vegetables are soft and lightly browned, about 10 minutes.
  3. Add the potatoes and cook for 3 minutes.
  4. Add the reserved clam juice and bottled clam juice. Bring to a simmer and simmer until the potatoes are soft, about 15 minutes.
  5. Add the clams and simmer for one minute more.
  6. Add the heavy cream and simmer until the cream thickens slightly.
  7. Season with salt, black pepper, cayenne pepper, and Tabasco to taste.
  8. Add the remaining thyme and the bacon, stir well, and serve immediately with bread.

Serves 2-3.

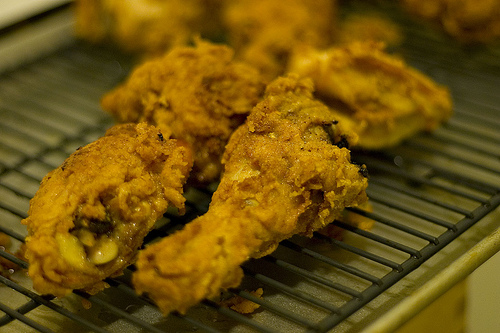
Ad Hoc Buttermilk Fried Chicken

The last several months have been as busy as any in my life.  We’re coming to the end of a large project at work which means that the hours are particularly long and I’ve had to travel for business for several weeks.  Add to that the holidays and a vacation, it means that I’ve barely had time to make dinner, let alone post about it.

But I did have enough time make some fried chicken the other night.  I’ve tried quite a few recipes for fried chicken, including one I posted before. And while some of them have been good, I never quite found one that was perfect. I think I’ve come a lot closer.

Before it was completely sold out nearly everywhere, Angela bought me the Ad Hoc Cookbook for my birthday. And one of the first recipes I had to try was for the fried chicken.

The brine keeps the fried chicken from drying out while adding flavor to the meat.  The crust is nearly perfect.  I kept picking out pieces that had fallen off the frying chicken and eating it.  It was even better eaten with the chicken.

Ad Hoc Buttermilk Fried Chicken
Adopted from Ad Hoc at Home

2 1/2 to 3 lbs chicken
2 cups buttermilk
peanut oil for deep frying

Brine:
8 cups water
1 lemon, halved
6 bay leaves
1 small bunch thyme
1 small bunch Italian parsley
2 tbsp honey
5 garlic cloves, cut in half width-wise
1/2 cup kosher salt

Coating:
3 cups all-purpose flour
2 tbsp garlic powder
2 tbsp onion powder
2 tsp paprika
2 tsp cayenne pepper
2 tsp kosher salt
1/2 tsp ground black pepper

  1. Bring the brine ingredients to a boil in a large pot.  Remove from the heat and allow to cool to room temperature.  Chill in the refrigerator until cold.
  2. Cut the chicken into 10 pieces (2 wings, 2 thighs, 2 legs, 4 breast pieces).  Add to the brine and refrigerate for 12 hours.
  3. Remove the chicken from the brine and allow it to rest in the refrigerator for at least several hours.
  4. Remove the chicken from the refrigerator 1 1/2 hours before cooking.
  5. Heat the oil in a large pot to 320ºF.
  6. Prepare two baking sheets with cooling racks on them.
  7. Whisk together the coating in a shallow bowl.  Place the buttermilk in another shallow bowl.
  8. Dredge the chicken, first through the flour coating, then in the buttermilk, then again in the flour coating.  Place the chicken on one of the baking sheets.
  9. When the oil is hot, add the legs and thighs to the oil and cook for 3 to 4 minutes or until it begins to color.
  10. Add the breast and wing pieces to the oil and cook for 10 to 12 minutes more or until the chicken is nicely browned and cooked through.
  11. Remove the chicken and place on the second baking sheet.
  12. Allow the chicken to cool slightly then serve.

Serves 2 to 3.

Beef with Cumin

Beef with Cumin

My mother-in-law was getting concerned that we weren’t eating because there was a gap in my posting here.  But we’ve mainly been eating either things that were already posted (roast chicken , smoked chicken, pork chops, or corn pasta) or we’ve been eating things that it seems a bit silly to post (steak frites, quick pastas). But every once in-a-while I make something that is both good and
worth posting.

We’ve been enjoying the bounty of the local farmer’s markets too much over the past summer and early fall.  The quality of the ingredients is so high that it seems like sacrilege to do anything more than just prepare the ingredients, whether meat or vegetable, as simply as possible.  However, there are only so many roast chickens and steaks one can eat before they feel they need a little elaboration on the topic.

Which brings me to Beef with Cumin.  I had seen reference to it online and, the pictures combined with the recipe intrigued me. In fact, it made me purchase flank steak especially to make it. However, flank steak is attractive enough to me that the first half of it went towards the aforementioned steak frites.

I was, however, determined to actually make the Beef with Cumin.  And make it I did.  Too many Sin0-American recipes are focused on hiding the flavor of the underlying ingredient, where meat, in particular, is interchangeable based on the dietary preferences of the diner  (Sweet-and-Sour Chicken is a prime example).  This is not one of those recipes.  Beef is the predominant flavor.  The cumin, the ginger, and the garlic all seek to complement the flavor of the beef.  It is beef with cumin, not cumin with beef.

Ingredients for Beef with Cumin

Beef with Cumin
Adapted from Revolutionary Chinese Cookbook: Recipes from Hunan Province

12 oz. flank steak
2 tsp finely chopped ginger
1 tbsp finely chopped garlic
2 fresh red chilies, seeds removed and diced
2-4 tsp dried red chili pepper
2 tsp ground cumin
salt
2 spring onions, green part only, sliced
1 tsp sesame oil
1 cup peanut oil

Marinade:
1 tbsp Shaoxing wine
1/2 tsp salt
1 tsp light soy sauce
1 tsp dark soy sauce
1 tbsp cornstarch
1 tbsp water

  1. Slice the beef across the grain into thin, bite-sized strips.  Add the marinade ingredients and mix well.  Allow to marinade for at least 30 minutes.
  2. Heat the peanut oil in a wok to 275°F.
  3. Fry the beef in the peanut oil, stirring regularly, for one minute.  Remove the beef from the oil and drain well.
  4. Pour off all but 3 tbsp of oil from the wok.
  5. Over high heat, stir fry the ginger, garlic, fresh chilies, dried red chili pepper, and cumin for 1 minute.  Return the beef to the wok, reheat the beef, and then remove from the heat.
  6. Drain off any excess oil from the beef.
  7. Stir in the spring onions and sesame oil.
  8. Serve with steamed rice.

Serves 2-3.

Salsiccie di Lucania (Pork Sausage from Lucania)

Pork Sausage from Lucania

I have something of a love-hate relationship with my sausage stuffer.  I adore sausage but, now that I have a sausage stuffer, I insist that whatever sausage we eat at home be homemade.  There’s a certain amount of setup required to make sausages and I feel the need to make a large batch to make it worth the effort.  Therefore, I ended up rolling the dice when trying a new recipe as to how they’ll turn out.

In this case, I knew I hit the jackpot as soon as I offered Angela a piece of the sample I used to check the seasoning.  No words were needed.  I could see the answer in her face.  And while Angela likes sausage, her level of appreciation is not equivalent to my own.  This sausage may have changed her mind.

I had been looking for a new Italian sausage recipe to use. My last attempt, while decent, had too much coriander seed for one. It just wasn’t quite right.

While this sausage can fill in for an “Italian sausage” (it is in fact a recipe of Italian extraction), it is not an Italian sausage in the traditional American sense.  It doesn’t have the fennel seed which is almost the defining characteristics of such sausages. It does, however, have a lot of garlic and ginger to provide flavor. It’s a lot simpler but still tasty. It can also be used as a breakfast sausage in a pinch (actually the first way I cooked it).

When I have 5 lbs. of sausage in the freezer, I remember why I like to have a sausage stuffer.  When viewing the cornucopia of sausages at a megamart (or even the farmer’s market for that matter), it’s hard to remember why I enjoy making my own.  Part of it’s just enjoying making sausages with Angela, part of it’s the quality, and part of it is choosing exactly what I want in a sausage.

Grinding meat for sausage

Salsiccie di Lucania (Pork Sausage from Lucania)
Adapted from Molto Italiano: 327 Simple Italian Recipes to Cook at Home

12 cloves of garlic, finely diced
1 oz. ginger, peeled and finely diced
6 oz. pancetta, chopped
5 lbs. pork shoulder, cut into 1″ pieces
1 lbs. pork fat, cut into 1″ pieces
tsp red pepper flakes
3 tbsp kosher salt
1 cup red wine

8 ft. pork sausage casings

  1. In a large bowl, combine all the ingredients except for the red wine  sausage casings.  Refrigerate until thoroughly cooled.
  2. Place the bowl containing the meat in an ice bath.  Grind the meat mixture through the smallest holes into another bowl in an ice bath.
  3. Add the wine to the mixture and beat with a paddle mixer at low speed for 1 minute.
  4. Cook a small portion of the sausage mixture in olive oil to verify seasoning.  While cooking the sample sausage mixture, place the remaining sausage mixture in the refrigerator.
  5. Stuff the sausage mixture into the sausage casings.  Twist into individual sausages.

Makes 6 lbs. sausages