Posts Tagged 'Dessert'

Sablés

Sables

These are the most addictive cookies I’ve ever eaten.  Even more so than Thin Mints.  It took a significant amount of will-power to not eat just one more.

Well, that was until we ate them all.  They only lasted two days.  There was a slight bit of miscommunication in our household involving the cookies (“Matthew ate them all!”). Angela still isn’t amused by that.

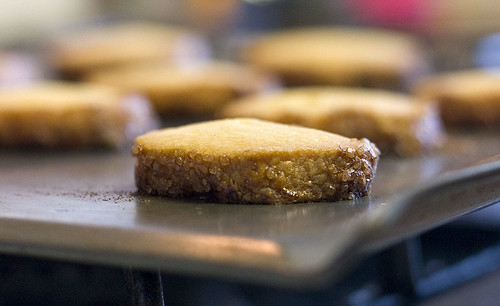
Sablés are lightly sweet with a predominant butter flavor.  In many ways, they are very French.  They’re basically the cookie form of a sweet tart dough but they also manage to be just a bit better than straight tart dough would be.  It may just be the shape (or the added sugar coating).

The problem I always have with recipes that need to be refrigerated is that when I want to make cookies, I want to make the cookies right now.  I don’t want to have to wait several hours to have the sweet ambrosia; I want it now.

It was my good fortune to actually wait and make these cookies.  The wait was definitely worth it.  We were nearly fighting over the cookies; they were that good.

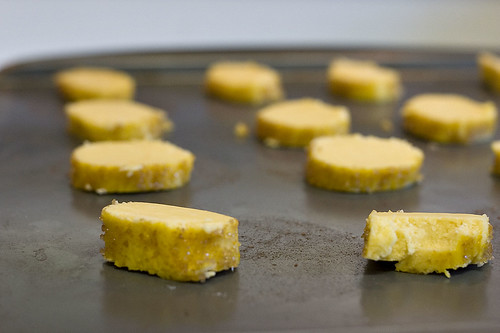
Sables Before Baking

Sablés
Adapted from Baking: From My Home to Yours

2 sticks unsalted butter, softened
1/2 cup sugar
1/4 cup powdered sugar
1/2 tsp salt
3 egg yolks
2 cups all-purpose flour
coarse sugar

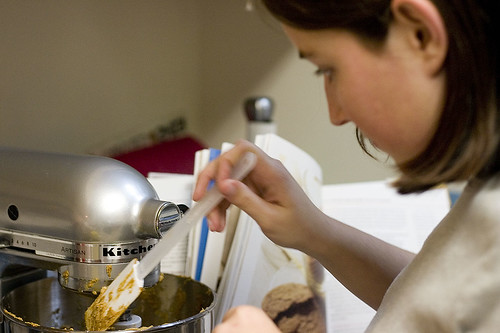
  1. In a stand mixer fitted with the paddle attachment, cream the butter at medium speed.
  2. Add the sugars and salt and beat until well blended, about 1 minute.
  3. Reduce the speed to low and beat in 2 of the egg yolks.
  4. Turn off the mixer and add the flour.  Pulse the mixer at low speed 5 times to begin to combine the flour.  Mix at low speed for about 30 seconds or until the flour is well incorporated.
  5. Remove the dough from the mixer bowl and place on a work surface.  Divide the dough in half.  Shape each half into an approximately 9-inch long smooth log and wrap it with plastic wrap.  Refrigerate for at least 3 hours, preferably overnight.
  6. Preheat the oven to 350ºF.
  7. Working with one log at a time, brush it on all sides with beaten egg yolk.  Sprinkle all over with the coarse sugar.
  8. Slice the log into 1/3 inch thick cookies.  Place the cookies on a baking sheet, separated by 1 inch.
  9. Bake for 17 to 20 minutes or until they are lightly browned on top.

Makes about 50 cookies.

Meyer Lemon Sorbet

CRW_0683


I realize it’s a bit strange to make sorbet in the middle of winter. But this is southern California and cold is a very relative concept around here (it was actually the recent rain that was bothering me).

However, winter also is lemon season (the fruit schedule from the farmer’s market claims that lemons are year round but I only see them in winter). I actually missed Meyer lemons the first time they appeared at the farmer’s market as I thought I had a bunch of lemons at home that were given to me by a coworker (turned out they were actually limes).

Angela and I were showing a friend of her family’s around and we went to Huntington Beach. It just so happened that they were having a farmer’s market that day and there was a vendor selling Meyer lemons. Given that I had passed them up the first time, I decided to snap them up while they were around.

Neither of us had had Meyer lemons before. They don’t really grow on the east coast (where ultimately we are from). I had, however, heard of their near-mythical flavor which is what drew me to them. It doesn’t hurt that Angela loves lemons.

While there are other lemon vehicles out there, none are quite as pure as sorbet. Plus I had a recipe for Meyer lemon sorbet. The sorbet is almost full proof to make. My only problem was I didn’t have quite enough for a full recipe.

The sorbet was quite good. I find the less bitter flavor of Meyer lemons to be significantly better than Eureka lemons. It was a cleaner flavor.

Angela thought that it could use to be a bit sweeter so you may want to add additional sugar in the future (and you think that’s a recipe note but it’s really a note to myself). I also think I’d replace the vodka with Limoncello next time.

And some kind soul left some home grown Meyer lemons in the kitchen area at work. I may have taken a few more than my fair share but I’ll put them to good use.

CRW_0664


Meyer Lemon Sorbet
Adapted from Room for Dessert
1 2/3 cup water
1/2 cup sugar
zest of 1 Meyer lemon
2/3 cup Meyer lemon juice (about 6 lemons)
1 tbsp vodka

  1. Place the water, sugar, and lemon zest in a small sauce pan. Stir over medium heat until the sugar has completely dissolved. Cool to room temperature.
  2. Stir in the lemon juice and vodka into the water mixture. Chill the mixture thoroughly in the refrigerator. Strain the mixture through a sieve and freeze in an ice cream maker according to the manufacturer’s instructions. Place in the freezer until ready to serve.

Makes about 3 cups.

Tartlette aux Framboise (Raspberry Tart)

CRW_0531


Growing up, my parents had a raspberry bush in the back yard. I used to love going down to eat them right off the bush. I even picked them and sold them in a mini-road side farm stand. It was all on the honor system and no one took advantage of me. Someone did eventually steal the Fisher Price picnic table that I used for displaying the produce but they may have assumed it was sitting out for the trash. Unfortunately, the raspberry bush is no longer there (it reached it’s fruit producing lifespan and my parents opted to not replace it) but my love of raspberries is.

On my first visit to France, there was a small bakery across the street from our hotel. The first couple days I partook of the hotel’s continental breakfast but was not particularly impressed. I went to the bakery for breakfast instead and settled on the raspberry tart. My French is practically non-existent but by a combination of half remembering framboise and pointing I was able to get what I wanted.

It may be the haziness of memory, but it was good. Really good. I did a little more traveling in France and couldn’t find anything similar. I’ve looked elsewhere and never found something quite as good. I found a raspberry tart in San Francisco but it used a lemon curd base which wasn’t what I was looking for.

CRW_0526


A while ago, I had decided that I would make myself a raspberry tart. I may not be a pastry chef (I don’t have the patience for that) but what better way to make something that you like? Aside from inertia, the main reason I had never attempted to make one before was simply that raspberries were expensive and I didn’t want to waste them by making a bad tart.

The other day, I was walking by Farm Boy and noticed they were advertising a half-pint of raspberries for $1.00. That was too good of a deal to pass up (regardless of the unknown provenance of the raspberries).

I really haven’t made any tarts before so it was an issue of figuring exactly what to use in making it. A tart consists of the tart shell, the cream used in the shell, and then the topping. I settled on pâte sablée and creme pâstissière because they seemed closest to what I’d had in the past and they both seemed fairly simple and classic. I’m not entirely sure it was the right choice.

The tart was good. Quite good. But the creme pâstissière seemed to overpower the raspberries a bit. The pâte sablée also didn’t have great structural integrity so the creme pâstissière started spilling out and making a mess. I ended up having to eat it with a fork.

This recipe may need a bit more work but it’s still good. It isn’t overly sweet. It would make a good afternoon snack.

CRW_0527


Tartlette aux Framboise (Raspberry Tart)

Pâte Sablée
Crème Pâstissière
1 cup raspberries

  1. Pat the dough into 3 four inch mini tart pans. Refrigerate the dough for 30 minutes.
  2. Preheat the oven to 425°F.
  3. Place a layer of aluminum foil over the tart pans. Place pastry weights on top of the aluminum foil.
  4. Place the tart pans on a baking tray and bake in the middle of the preheated oven for 20 minutes.
  5. Remove the tart pans from the oven, remove the pastry weights and aluminum foil, and return to the oven. Bake for 7 more minutes.
  6. Remove the tart pans from the oven and allow to cool completely. Remove the tart dough from the tart pan.
  7. Rinse and dry the raspberries.
  8. Place a layer of crème pâstissière in each tart. Cover with the raspberries.
  9. Chill completely and serve.

Makes 3 mini-tarts.


Pâte Sablée (Shortbread Dough)
Adapted from The Roux Brothers on Patisserie

250 g flour
200 g cold butter (about 7 tbsp), diced
100 g powdered sugar
pinch of salt
2 egg yolks

  1. Sift the flour onto a work surface and make a well in the center.
  2. Place the butter in the well and work with your fingers until it is very soft.
  3. Add the powdered sugar and the salt to the butter and cream them together with your fingers.
  4. Add the egg yolk to the well and mix well.
  5. Slowly incorporate the flour into the butter mixture. Mix until it is just homogeneous.


Crème Pâstissière (Pastry Cream)
Adapted from The Roux Brothers on Patisserie

6 egg yolks
125 g sugar
40 g flour
500 ml milk
1/2 tsp vanilla extract

  1. Place the egg yolks and 1/3 of the sugar in a bowl. Whisk together until pale ribbons are formed. Whisk in the flour.
  2. In a sauce pan, combine the flour, remaining sugar, and vanilla extract. Heat over high heat.
  3. When the mixture begins to bubble, remove from the heat. Temper 1/3 of the milk mixture into the bowl with the eggs, stirring constantly. Pour the milk and the eggs back into the sauce pan, stirring constantly.
  4. Heat over medium low heat, stirring constantly, until the mixture thickens.
  5. Remove from the heat and allow to cool completely.

Normandy Apple Tart

CRW_0318


This was actually made over a week ago. I had queued up a couple recipes as we last Friday we headed to the airport to fly to visit Angela’s parent’s for Christmas. We made it to the airport with plenty of time to spare. Our flight took off on time and it looked like our trip would be uneventful.

And then we arrived over Milwaukee. And entered a holding pattern. We circled for about an hour until we were told we were running out of fuel and had to divert to Madison. Flaps were out, landing gear was down, and we were approaching the run way. I could just see the landing lights through the fog and then the pilot gunned the engines and pulled up. Turned out we had to abort the landing as air traffic control wasn’t sure whether or not there was another plane on the runway. We were able to turn around and land successfully.

CRW_0303


And then we had to wait to get our luggage. And then take a bus to Milwaukee where we found out we could get a flight out the next day. The airline was nice enough to give us a hotel to stay in (of course, they gave us the wrong name of the hotel first and once we got the correct name gave us incorrect information as to how to contact them).

The next day was as fogging as the last. And pretty quickly our flight was canceled. We rebooked for the next day and went to another hotel.

So, after two days, the fog cleared and we showed up at the airport again, a bit hopeful, a bit apprehensive. At first, our flight was going to be delayed. And then it was on time again. When we saw the plane at the gate, Angela did a happy dance. And when, sitting at the end of the runway, the pilot revved the engine and we started accelerating, I had one of the biggest smiles on my face ever (not quite as big as my wedding day).

And I’ve never been happier to be in Florida.

Of course, this has nothing to do with the apple tart. I like apple tart’s quite a bit and am always looking for new ones to try. For some reason, I tend to like them better than apple pie. It may not be very American of me but it’s true (call homeland security!).

This apple tart is mostly apple sauce in a tart shell covered with sliced apples. It’s very simple. It doesn’t even use cinnamon. It’s apples at their simplest.

When I made it, the green apples we had were extremely tart. So tart that I felt the need to sprinkle sugar on top of the tart even though the original recipe didn’t call for it. And it was still tart. So be aware.

CRW_0316


Normandy Apple Tart
Adapted from Baking: From My Home to Yours

1 9-inch partially-baked sweet tart shell

For the applesauce:
2 lbs. red apples
1/4 cup water
1 tbsp light brown sugar
1-4 tbsp sugar (optional)

For the topping:
2 medium green apples
egg wash of 1 egg beaten with 1/2 tsp water
2 tbsp sugar

  1. Cut the apples into chunks and place in a large saucepan. Mix in the water and brown sugar. Cover and heat over medium-low heat. Cook at just below a simmer until the apples are soft, about 15 to 20 minutes.
  2. Remove the pan from the heat and run the apples through a food mill fitted with a disc with the largest holes. Taste the sauce and add sugar if necessary. Allow to cool to room temperature. The sauce may be refrigerated for several days.
  3. Preheat the oven to 400ºF.
  4. Fill the tart shell almost to the rim with the apple sauce.
  5. Peel and core the green apples. Slice them thinly. Arrange the apple slices in a spiral pattern on top of the apple sauce. Rub the cut apples with the egg wash and sprinkle with the sugar.
  6. Bake the tart for 45 to 50 minutes.
  7. Serve warm or at room temperature.

Serves 8.


Partially-Baked Sweet Tart Shell
Adapted from Baking: From My Home to Yours

1 1/2 cups all purpose flour
1/2 cup confectioners’ sugar
1/4 tsp salt
9 tbsp cold butter, cut into 1 tbsp chunks
1 egg yolk

  1. Place the flour, sugar, and salt in the bowl of an electric mixer fitted with the paddle attachment. Mix briefly, until the ingredients are well combined.
  2. With the mixer at low speed, add the butter 1 tbsp at a time. When the butter is fully added, increase the speed to medium, until the butter and flour mixture forms pea sized granules.
  3. Reduce the speed to low and add the egg yolk. Increase the speed to medium and mix until the dough is slightly sticky.
  4. Remove the dough from the mixer bowl and press it into a fluted 9-inch tart pan.
  5. Put the tart pan in the freezer and freeze for at least 30 minutes.
  6. Preheat the oven to 375ºF.
  7. Press a greased sheet of aluminum foil onto the tart dough. Bake for 25 minutes.
  8. Remove from the oven and remove the aluminum foil. Press down any places the dough has puffed. Allow to cool before using.
Molasses Spice Cookies

CRW_0414


Maybe I should start with a confession: I didn’t make these. Angela did. But I helped!

I like cookies a lot. They’re probably my favorite dessert to make. I think it’s the portability of the cookie that really appeals to me. There’s no need to get out a plate or fork. You can just pick it up and eat it wherever.

And I end up eating a lot of cookies. I’ve become known for it at work. I like them to take with my lunch and I’ve been known to (frequently) eat them for breakfast. It can’t be much worse than a donut can it?

CRW_0406


We didn’t follow this recipe in all regards. It called for adding black pepper and that didn’t appeal to us (well, Angela really since she made the cookies). Supposedly it adds a spicy surprise but I wasn’t sure that pepper was a flavor I’d like in my cookies. So we omitted it and the cookies are still quite good.

Strangely, I think the cookies are better the next day than they are freshly baked (heresy I know). They firm up a bit which improves their texture. If I were to make them again, I think I would add some grated nutmeg. There’s definitely a missing flavor (which could simply be the lack of black pepper) that I think nutmeg would correct. Either way, these are still some pretty good cookies and seem appropriately Christmasy for me.

CRW_0410


Molasses Spice Cookies
Adapted from Baking: From My Home to Yours

2 1/3 cup all purpose flour
2 tsp baking soda
1/2 tsp salt
2 tsp ground ginger
1/2 tsp ground cinnamon
1/4 tsp ground allspice
12 tbsp butter, softened
1 cup light brown sugar
1/2 cup molasses
1 egg
about 1/2 cup sugar

  1. Whisk together the flour, baking soda, salt, and spices.
  2. In a stand mixer with a paddle attachment, beat the butter on medium speed until it becomes smooth and creamy.
  3. Add the brown sugar and molasses and beat to blend, about 2 minutes.
  4. Add the egg and beat for 1 minute more.
  5. Reduce the mixer speed to low and add the dry ingredients. Mix only until it is homogeneous. Turn off the mixer and verify that all the flour is mixed in by folding the mixture together several times with a spatula.
  6. Remove the cookie dough from the mixer bowl and divide it in half. Wrap each half in plastic wrap and refrigerate for 1 hour or more.
  7. Preheat the oven to 350°F. Line two cookie sheets with parchment paper.
  8. Remove the dough from the refrigerator. Divide one half into 12 different balls about 2 tbsp in size. Place each ball on a cookie sheet. Dip the bottom of a cup into sugar and press one of the balls flat, until it is 1/4″ thick. Repeat with the remaining balls and then the remaining half of the dough.
  9. Bake each cookie sheet for 12 to 14 minutes. Allow the cookies to cool and then remove them from the cookie sheet. Repeat with any remaining cookie sheets
  10. Store in a air tight container.

Makes about 24 cookies.

Sea Urchin Chocolate Cookies

CRW_9673

David Lebovitz calls these Black & White Cookies. Now, I think he’s wrong. I’m pretty sure what’s pictured on Wikipedia is not what I made (and how could Wikipedia be anything but completely correct?). He also says that they could be called earthquake cookies or chocolate tremors (because apparently the cracks look like those caused by earthquakes). Again, I’m going to have to disagree.

What do these cookies really look like? Like a sea urchin. True, it may not be the most appetizing comparison ever (all I can think of is the original Iron Chef and their usage of sea urchin roe) but, hey, it’s what they look like.

It took me awhile to figure out what they really looked like to me. I started by thinking it looked like some kind of mineral but I couldn’t find an appropriate one (trust me, there are a lot of minerals out there). Then I thought maybe it looked like a sea sponge. And then I finally settled on sea urchin.

CRW_9664

I’m a bit restricted when I make desserts as I have a certain significant other who doesn’t like nuts (or so she claims). This means that I have to adapt the desserts to remove the nuts. For things like chocolate chip cookies, that means that I just leave them out. In this case, the original recipe called for them to be ground in a food processor which made it a bit more complicated. So I just added a little bit more flour and it seemed to work out.

According to the recipe (I doubled it), this should make 80 cookies. It made much closer to 50 (I believe it was exactly 52; I don’t count, I just lay them out in orderly rows). I’m not entirely sure how one would get 80 cookies out of this batter (I really don’t think the almonds made enough of a difference but who knows). I was confused enough by it that I actually measured the size of my pre-baked cookies to make sure that they were actually an inch in diameter. I think I may need more things to do with my time.

My final comment on the cookies is that the batter really really firms up when you refrigerate it. It was almost too firm to work with (the heat in my hands did help with that). I’d also recommend that you form the cookies in an assembly line fashion. Form all the cookies first, then coat them with each sugar. I’ve actually had to take training classes in Lean+ that tell you things such as that.

CRW_9668

Sea Urchin Chocolate Cookies
Adapted from Room for Dessert

1 lb bittersweet chocolate
6 tbsp butter
3 tbsp dark rum
4 eggs, at room temperature
2/3 cup granulated sugar, plus more for rolling cookies
1 1/4 cup all purpose flour
1 tsp baking powder
powdered sugar for rolling cookies

  1. In a double broiler, melt the chocolate, butter, and rum.
  2. Combine the eggs and granulated sugar in an electric mixer on medium speed fitted with the whisk attachment. Whisk for 5 to 7 minutes or until they form a ribbon.
  3. Switch to the paddle attachment and add the flour and baking powder. Mix on low speed to combine.
  4. Refrigerate the batter until it is firm, at least 1 hour and up to several days.
  5. Preheat the oven to 325°F.
  6. Take 1 1/2 tbsp of batter and roll it between your palms to form a ball. Repeat with the remaining batter.
  7. Place the granulated sugar in one bowl and the powdered sugar in another. Roll each ball in the granulated sugar and then in the powdered sugar. Place them on a baking sheet spaced about 1″.
  8. Bake for 12 to 14 minutes. Allow to cool slightly before removing from the baking sheet. Store in a airtight container.

Makes about 50 cookies.

Whoopie Pies

CRW_9654

Angela had planned to go to a yarn swap yesterday (I know as much about these as you do, trust me) and had apparently volunteered me to make some sort of edible goodie. This isn’t that big of a deal but it’s helpful when she, you know, has some idea of what she’d like me to make.

So I ran (well, slowly walked) to my cookbook shelf (scratch that, it fills up the entire bookcase now) and started to look through my collection. We started off with the idea that I’d make something savory (as apparently there’d be other sweet items) but that quickly fell by the wayside when we realized it’d be difficult to take something that was warm.

Eventually I thought of whoopie pies. I reached for the Mennonite Community Cookbook, certain that the recipe would be in its spiral bound interior. Alas, I was mistaken. Despite the fact that my mom used to make them growing up and that I’ve always associated them with Mennonites (and by extension Pennsylvania-Dutch), it was not to be found in one of the foremost Mennonite culinary tomes. I did have a recipe for pumpkin whoopie pies that my aunt sent me but the sugar pumpkin I have is reserved for pumpkin pie (both of which will be feature on here later).

So I resorted to the internet. And I ended up at Bella Online: The Voice of Women. Er, right. Voice of women. Okay. I’m just here for the recipe, thanks (this reminds me of the time I had to stop by Angela’s gynecologist to pick up a prescription for her; I’ve never gotten such looks of hatred in my life).

The recipe itself was pretty close to what I remember (Epicurious uses marshmallow fluff which is simply wrong). My only problem was that the cookie part didn’t puff up to the height I’m used to. They are, however, quite good. Do be aware that the filling has raw egg whites in it (sadly, I had to tell my pregnant cousin not to eat any). And scooping the batter onto the cookie sheets makes quite a mess.

And there would’ve been more pictures but individual whoopie pies look a bit sad (or at least the ones I make do).

Whoopie Pies
Adapted from Bella Online

Cookie Ingredients:
4 cups flour
2 tsp baking soda
1 cup dutch-process cocoa powder
pinch of salt
2 cups sugar
1 cup vegetable shortening
2 eggs
1 cup milk
1 cup warm water
2 tsp vanilla

Filling Ingredients:
2 tsp vanilla
4 tbsp flour
4 tbsp milk
4 cups powdered sugar
1 1/2 cups vegetable shortening
2 egg whites

  1. Preheat the oven to 375ºF.
  2. Sift together the flour, baking soda, cocoa powder, and salt.
  3. In an electric mixer, beat the sugar, vegetable shortening, and eggs for about 2 minutes on medium speed. Slowly add the flour mixture. Add the milk, water, and vanilla and mix for 3 minutes.
  4. On an ungreased, nonstick baking sheet, place tablespoon full drops of batter. The batter will be very liquid and spread easily. Leave ample room between the drops.
  5. Bake for 10 to 12 minutes. Remove from the baking sheet and allow to cool on a wire rack.
  6. Beat together all the filling ingredients except for the egg whites in an electric mixer on medium speed until well combined.
  7. Beat the egg whites until stiff peaks form.
  8. Fold the egg whites into the filling.
  9. Spread the filling on the bottom of a cooled cookie. Top with another cooled cookie. Wrap individually in plastic wrap.

Madeleines

CRW_9610

I have no idea where my love of madeleines developed from. At some point in the past year, I knew that I liked them but I don’t know when I had had them. I do know that the ones usually available in the US are expensive (seriously, Trader Joe’s sells them for about $1 per cookie) and not particularly good.

This summer, I had decided that at some point in the indefinite future I was going to get madeleine pans. Whenever we’d go into a store that would sell esoteric kitchen supplies, I’d look for them and determine that I really didn’t want to buy a single use pan (Alton Brown would be upset with me now) for $12 (realizing that I’d probably need at least two to make them effectively).

CRW_9598

When my in-laws came to visit, we tend to end up at shopping locations more frequently. As I was still on my quest, I continued to look for them and mentioned to my in-laws. About a week after they had left, a package arrived in the mail for Angela and I and, lo and behold, there were two non-stick madeleine pans inside. Apparently, my mother-in-law had decided that she needed to go out and buy them for me right away. Her decision was my gain.

This isn’t the first time I’ve made madeleines but the first time I’ve used this recipe. This recipes seems to produce a better texture but the other recipe (from Susan Herrmann Loomis) seemed to make one with better flavor. I think I may combine the two at a later date. Either way, madeleines are always good.

CRW_9600

Madeleines
Adapted from Baking: From My Home to Yours

1 1/3 cup all purpose flour
1 1/2 tsp baking powder
pinch of salt
1 cup sugar
grated zest of 2 lemons
4 large eggs, at room temperature
4 tsp vanilla extract
12 tbsp melted butter, cooled

  1. Place madeleine pans in the refrigerator.
  2. Mix together the flour, salt, and baking powder in a bowl.
  3. In a mixer’s bowl, mix together the sugar and lemon zest with your finger.
  4. Add the eggs and, using the whisk attachment, mix at medium speed for 2 to 3 minutes. Add the vanilla extract and mix to combine.
  5. Fold in the flour followed by the melted butter.
  6. Remove the madeleine pans from the refrigerator and grease them. Place batter into pans, about 1 tbsp per madeleine.
  7. Refrigerate the pans and any remaining batter for at least 1 hour.
  8. Preheat the oven to 400°F.
  9. Bake the madeleines for 11 to 13 minutes. There’s no need to refrigerate any remaining batter before cooking.

Makes 24 madeleines.

Cinnamon Pound Cake

Cinnamon Pound Cake

Angela has class on Tuesday nights which means I’m home alone (although I don’t have to fight a couple of bungling burglars with improvised comedic devices). My dinner on those nights is usually something Angela doesn’t like but I was feeling a bit lazy last night so just made a sandwich. I did, however, decide to make a surprise for her when she came home.

This recipe has been sitting on our refrigerator door for about 6 months now. We originally picked it up at Penzeys Spices on our first visit to their retail store. I made it last night because I wanted something for breakfast the next day and the recipe card proclaims “This cake is wonderful for dessert but even better for breakfast.” Cake for breakfast? How could I not be all over that? (Of course, I’ve never had cake for breakfast before; never).

In regards to Penzeys, on that first visit I decided to buy cinnamon sticks because freshly grated cinnamon has to make food better, doesn’t it? I’m really not sure if food is better with freshly grated cinnamon, but I do know that it’s a pain to grate a full tablespoon of cinnamon. Here I was looking for any easy surprise to bake for my wife and instead I spend 15 minutes microplaning a cinnamon stick. Of course I decided to do this after I started mixing the cake ingredients. Mis-en-what?

I found some of the typesetting of this recipe to be a bit odd. In the ingredients list, the word cups was capitalized for no particular reason. Also, PURE VANILLA EXTRACT, CINNAMON SUGAR, and CINNAMON were in all-caps. I’m assuming it’s because Penzeys sells products by those names but why not do what every other brand does and specify your brand there (are they fooling anyone?). The way it looks, they’re just yelling at me (that better be PURE VANILLA EXTRACT or else!). My final comment would be that it listed 3 teaspoons of baking powder instead of 1 tablespoon. I have no idea what the purpose of that would be (do many people have tablespoon measuring spoons that don’t fit into their baking powder jar? my oversized plastic ones do).

Cinnamon Pound Cake
Adapted from Penzeys One, volume 1 issue 3, originally by Scott and Jackie Nelson

1 cup butter, softened
2 cups sugar
4 eggs
1/2 tsp vanilla extract
3 cups flour
1 tbsp baking powder
1 cup milk
5 tbsp cinnamon sugar (or 1 tbsp cinnamon mixed with 4 tbsp sugar)

  1. Preheat oven to 300° F.
  2. Grease a loaf pan (the recipe wants you to use a tube pan which I’ve never heard of; it fits perfectly in a loaf pan plus that’s the shape every pound cake I’ve ever seen has been).
  3. Cream the butter.
  4. Add the eggs, sugar, and vanilla extract. Mix well.
  5. In a separate bowl, combine the flour and baking powder (the recipe specifies sifting but I cheated and just mixed them).
  6. Add half the flour to the butter mixture. Mix to combine.
  7. Add the milk to the butter mixture. Mix to combine.
  8. Add the remaining flour to the butter mixture. Mix to combine.
  9. Sprinkle 1/3 of the cinnamon sugar on the bottom of the loaf pan.
  10. Add half of the batter to the loaf pan (really try for half; I failed and it was much closer to 3/4 than half but it still tasted good).
  11. Sprinkle 1/3 of the cinnamon sugar on top of the batter in the loaf pan.
  12. Add the remaining batter to the loaf pan.
  13. Sprinkle the remaining cinnamon sugar on the top of the batter.
  14. Bake for 1 hour and 15 minutes.

Servers 25 to 30 (or just 2, if you’re us)


Flickr Photos