Archive for the 'Recipe' Category


Homemade Pancetta

CRW_0103

One of my best memories of pancetta is it in a very American context. I had been through a 4 week study abroad in Italy and was then traveling around Europe. My mom had joined me for a week and we were in Riomaggiore in Le Cinque Terre. Staying in a small apartment, we decided to make breakfast for ourselves to save money. The best breakfast I can remember was simply fried eggs with pancetta cooked in a manner similar to bacon. And it’s not that the product was particularly good (it was), but it was simply such a comforting change from the Italian food I’d been eating for months.

I actually tried to recreate that breakfast back at home but the pancetta I got was too salty and was practically inedible. The main problem with pancetta here is just how expensive it is. It’s really hard to justify paying the equivalent of $16 a pound for pork belly (or more!). Trader Joe’s sells it for a fairly reasonable price but, anymore, they only sell the pre-diced version which isn’t bad, it just doesn’t do well for things that requiring stuffing (such as braciale).

CRW_9726

Ever since I bought the cookbook Charcuterie, I had wanted to make pancetta. It’s probably the inner engineer in me, but there’s something particularly exciting about the chemical changes necessary to cure meat. That, and it tastes good (after all, it’s pretty much bacon).

I was particularly proud of making the pancetta. It’s not that it took a lot of work (it just took awhile to cure and then dry). Similar to the bratwurst, it was the act of making something that was far different than I’d ever made before (I act like I was personally changing the chemical bonds to cure the meat).

The recipe is pretty easy as long as you have the proper materials. Measuring by weight is important as otherwise you run the risk of changing the ratio of kosher salt to pink salt. Pink salt is not the pink Himalayan salt but is instead salt with 6.25% sodium nitrate. It’s colored pink so that you don’t mistake it for regular salt (sodium nitrate is toxic in large quantities but the sodium nitrate will chance composition as the meat cures so there’s no risk).

CRW_0096

The drying step is optional but makes for a more authentic product. I used a small refrigerator that I had left over from college for the curing and drying portions as it had plenty of room and my normal refrigerator is pretty full (I also use it to cool down chicken stock and to brine a Thanksgiving turkey).

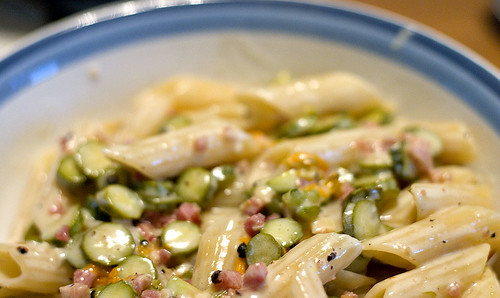
As for the flavor? It was good. Really good. It was almost so flavorful that it was too flavorful to eat. I can’t wait to try it in Pasta with Corn, Pancetta, and Sage or Spaghetti alla Carbonara (of course if I could find some pork jowl I’d try and make guanciale).

CRW_9730

Homemade Pancetta
Adapted from Charcuterie

One 4-pound (1.8 kg) pork belly, skin removed
3 garlic cloves, minced
8 grams (1.5 tsp) pink salt
35 grams kosher salt
18 grams (1.5 tbsp) dark brown sugar
28 grams (3 tbsp) ground black pepper
7 grams (1.5 tbsp) juniper berries, crushed
3 bay leaves, crumbled
3 grams (.75 tsp) grated nutmeg
3 or 4 sprigs of thyme

  1. Trim the pork belly to be rectangular and remove the skin if present.
  2. Combine all the ingredients except the pork belly and half of the black pepper in a bowl. Rub the mixture onto all sides of the pork belly.
  3. Place the pork belly in a large 2-gallon zip top bag and refrigerate for one week, turning over every other day. When the pork belly is done curing, it will be firm in the middle. If it’s not firm, refrigerate for one to two more days.
  4. Remove the pork belly from the zip top bag and rinse under running water thoroughly. Dry completely with paper towels. Spread the remaining black pepper over the meat side of the pork belly. Roll the pork belly tightly (there should be no air pockets) and secure with butcher’s twine. Make sure to loop both around the circumference of the roll and around the length of the roll.
  5. Place the pork belly in a spare refrigerator set to its lowest setting on a middle shelf. Place a tray of water combined with 2 tbsp kosher salt in the bottom. This will allow the pancetta to dry. Leave in the refrigerator for 2 weeks.
  6. After drying, the pancetta will keep in a refrigerator for 3 weeks and a freezer for 4 months.

Yields 3 lbs. pancetta

Heirloom Tomato Soup

CRW_9862

Most weeks at the farmer’s market, I buy tomatoes when they’re in season (which is most of the year around here; eating seasonally has a whole different meaning in Southern California). Recently, I’ve seen not only the standard Roma and Beefsteak tomatoes, but also a variety of heirloom tomatoes. Normally, I buy the Romas and make a tomato sauce out of them. This week, though, the heirlooms were calling my name. It didn’t hurt that one stand was selling them for only $2.00 per pound.

Our farmer’s market is on Sunday and, sadly, two of the smaller tomatoes didn’t make it until Thursday. At that point, it became imperative to actually eat them and not allow them to slowly explode on our counter top.

I had met Angela for lunch on Thursday so a lighter and simpler dinner was in order. I had originally thought about making pappa al pomodoro but the leftover bread was too far gone to resuscitate (and there wasn’t much left). Instead, I decided to just make a simple tomato soup.

CRW_9848

This isn’t the first tomato soup I’ve made but, despite some similar ingredients, this is rather different. This is a lot simple and is much more centered around the flavor of ripe tomatoes. Last night, the simple flavors worked very well.

We also discovered that Angela and I prefer different levels of salt in this dish: her more, me less. This is a bit unusual as I usually like my food a little more well seasoned than she does. So make sure you taste for seasoning before serving.

There’s no requirement to use heirloom tomatoes in this soup but I can’t help to think that it fits the spirit of the dish better. But, really, whatever is fresh and ripe.

CRW_9856

Heirloom Tomato Soup
Adapted from The Art of Simple Food

2 tbsp olive oil
2 tbsp butter
1 medium onion, sliced
1 small leek, white and pale green part sliced
salt
2 garlic gloves, peeled and sliced
2 lbs tomatoes
1 tbsp white rice
1/2 bay leaf
1 sprig thyme
1 cup water

  1. In a large sauce pan, melt 1 tbsp butter with the olive oil. Add the onions and leeks and a large pinch of salt and sweat until they’re softened, about 10 minutes. Do not allow them to brown.
  2. Add the garlic and sweat for 2 minutes more.
  3. Add the tomatoes, rice, bay leaf, thyme, and a large pinch of salt. Cook over medium heat until the tomatoes begin to fall apart, about 10 minutes.
  4. Add the water and remaining 1 tbsp butter. Simmer for 10 more minutes.
  5. Purée in a blender for 1 minute in batches. Push the soup through a medium strainer.
  6. Taste for seasoning and reheat if needed. Serve topped with crutons and a drizzle of olive oil.

Serves 2 as a main course, 4 as an appetizer.

Chicken Stuffed with Prosciutto, Herbs, and Cheese

CRW_9838

Yesterday morning, I pulled some boneless chicken thighs out of the freezer with the idea of doing something with them for dinner. My original though was to make some sort of stir fry but, when dinner time approached, stir fry no longer held the allure it did previously.

That left me sitting on the floor in front of my bookcase full of cookbooks (I think I may have a problem…) desperately trying to find something to make. Boneless chicken thighs aren’t exactly common in cookbooks but to add to the difficulty was the fact that we were out of eggs which made a breadcrumb coating impossible.

In the end, I decided to be adventuresome and forgo a recipe. This is a bit unusual for me. Normally I like the comfort and safety of a recipe (not that that’s a guarantee of success; Will can attest to my pumpkin pie failure). I also don’t find myself to be particularly creative or good at finding compatible ingredients (I think that means I wouldn’t be a particularly good chef).

CRW_9828

While looking through the cookbooks, I had decided that some sort of rolled and stuffed would be preferable. So, heading to the fridge, I tried to figure out exactly what I could stuff the chicken with. Prosciutto is an obvious choice as what doesn’t go well with prosciutto? Parmesan cheese would be a good complement (I had originally though of using provolone but Angela isn’t a big fan of it and it can be a bit strong). Finally, I went through some of the fresh herbs that I’ve accumulated recently and settled on thyme and savory (mainly because I wasn’t entirely sure of the taste of savory).

In the end, the chicken turned out pretty well. The only problem was that it took longer than I expected and that there were a bit too many herbs (the recipe here presents a reduced amount). The sauce it’s cooked also cooked down a bit much so there wasn’t any for pouring but the chicken didn’t need it.

CRW_9831

Chicken Stuffed with Prosciutto, Herbs, and Cheese

2 boneless, skinless chicken thighs
2 slice prosciutto
2 tbsp grated parmesan cheese
2 sprigs thyme, leaves only, diced
1 sprig savory, leaves only, diced
salt and pepper
1/4 cup flour
2 tbsp olive oil
4 sun-dried tomatoes, diced
1/4 cup white wine or vermouth
1 cup chicken stock

  1. Spread the chicken thighs flat and season the inside with salt and pepper. Place one slice of prosciutto on each chicken thigh and then sprinkle with cheese and herbs. Roll up the chicken thighs along the longest axis. Tie in two places with butcher’s twine or secure with toothpicks. Season the outside of the chicken with salt and pepper on all sides. Dredge the chicken in the flour.
  2. In a large skillet, heat the olive oil over medium-high heat. When the oil is hot, add the chicken and brown on all sides. Remove the chicken to a plate.
  3. Add the sun-dried tomatoes and cook for 1 minute.
  4. Deglaze the pan with the white wine or vermouth, scrapping up any brown bits. Add the chicken stock and return the chicken. Cover and simmer until the chicken reaches 165ºF, about 30 minutes.
  5. Remove the chicken from the skillet and top with the sun-dried tomatoes. Cut the butcher’s twine on the chicken or remove the tooth picks.

Serves 2.

Cornmeal Herb Pork Tenderloin

CRW_9795

I think that the pig, in the words of Homer Simpson, is a “wonderful, magical animal.” What else could produce such variety as bacon, ham, and pork chops. Getting the best out of most cuts of pork requires lots of time; whether curing, smoking, or just a simple braise.

Unfortunately, most days I don’t have that kind of time (sadly, my employer seems to prefer it when I actually go to work during the day; who knew). So every once in awhile we buy a pork tenderloin. It’s not the most flavorful cut but it cooks quickly and doesn’t get that tough (for some reason, Angela really likes her meat tender).

Pork tenderloin (I always have to look twice at recipes and make sure I’m not mistaking pork loin for pork tenderloin) doesn’t stand well on its own. By that, I mean that it’s similar to something like a chicken breast: you don’t want just a chicken breast as it’s fairly bland; you need to add something to it. Because of this, I’m always looking for good pork tenderloin recipes.

This recipe seemed to work particularly well for the pork. The herbs add good flavor but don’t totally overpower the porkyness. The cornmeal works well as a binder and adds good texture. The only problem with the original was that I don’t own a grill (despite the near year-round grilling whether here in Southern California, I have no where to put a grill), so I had to adapt it to oven cooking.

I also ended up changing the herb mixture a bit as I didn’t have any fresh rosemary. I could’ve used dried but something about the recipe screams for fresh herbs to me. While it’s fall now, I think there’s something spring-like about an herb crusted meal (particularly if it were to actually be grilled).

CRW_9789

Cornmeal Herb Pork Tenderloin
Adapted from Apartment Therapy
1 1-lbs pork tenderloin
1/2 cup Italian parsley
5 sprigs of thyme, leaves only
5 sage leaves
4 sprigs of tarragon, leaves only
3 garlic cloves, peeled
1/4 cup cornmeal
2 tbsp olive oil
salt and pepper

  1. Preheat the oven to 350°F.
  2. Combine the parsley, thyme, sage, tarragon, and garlic cloves in a food processor. Pulse to combine. In a bowl, mix together the herbs and the cornmeal. Slowly add 1 tbsp of the olive oil and mix to combine.
  3. Season the pork tenderloin with salt and pepper. Rub the cornmeal mixture over the pork tenderloin.
  4. Put the remaining 1 tbsp of olive oil in a large, oven-proof skillet over medium-high heat. Once the oil is hot, brown the tenderloin on three sides.
  5. After browned on three sides, turn the tenderloin to the fourth side and place in the oven. Cook until the tenderloin reaches an internal temperature of 135°F, approximately 10 minutes.
  6. Remove from the oven and allow to rest for 5 minutes. Slice and serve.

Serves 2 to 3.


Spaghetti alla Amatriciana Bianco

CRW_9785

Simple pasta dinners are a staple in our household (it should really be apartment-hold but I don’t think that’s a real word). The main reason is that we frequently can’t figure out what to actually eat for dinner and we usually get to the point where either I need to make something very fast or we go out to dinner (and, given both of us have an innate frugality, eating out is seldom an option).

This is the point where I usually reach for a simple pasta recipe. This was the situation last night. To complicate matters further, we had spaghetti al pomodoro earlier in the week so a tomato sauce is out.

We eat traditional Bucatini alla Amatriciana relatively regularly (as regularly as anything we eat) so the same dish just without the tomatoes sounded like it could be a winner. And it was quite good. It’s very similar to Spaghetti Alio e Olio, just with panchetta added (and how could that be a bad thing?). The dish is extremely fast: the critical path is the cooking of the pasta. The sauce cooks in about 4 to 5 minutes. The only key is to not put in any more butter or olive oil than specified; if you do, it will end up too oily.

CRW_9775

In other news, we didn’t clean up from the pork chops the other night and we think our cats absconded with the leftovers. Oops. I’m just hoping they didn’t hide it somewhere and we’ll find it in several weeks. Our cats eating pork always makes me imagine the two of them stalking and attacking a pig.

CRW_9778

Spaghetti alla Amatriciana Bianco
Adapted from Trattoria Cooking

1/2 lbs. spaghetti or bucattini
1 tbsp butter
2 tbsp olive oil
2 oz. panchetta, diced
a pinch of red pepper flakes
1/4 cup Italian parsley, diced
1/3 cup grated parmesan cheese plus more for serving

  1. In boiling salted water, cook the pasta for 1 minute less than indicated on the packaging. Drain the pasta, reserving 1/4 cup of the pasta cooking water.
  2. In a large skillet, melt the butter with the olive oil over medium heat. When the butter stops foaming, add the panchetta and red pepper flakes and cook until browned, about 2 to 3 minutes.
  3. Add the cooked past, the reserved cooking water, the parsley, and parmesan cheese. Stir and scrap up any browned bits stuck to the bottom of the pan. Cook for 1 minute more. Serve with extra grated parmesan cheese on top.

Serves 2.

Spaghetti al Pomodoro (Spaghetti with Tomatoes)

CRW_9746

Sometimes the simplest things are the best. And I think that spaghetti with a simple tomato sauce is one of them. Just the taste of pure, ripe tomatoes. Not overcooked and not overly complicated.

Recently, there was a book published (which I haven’t read) regarding the choice of last meals for chefs (apparently that discussion is popular among chefs). Apparently, the most common selections are simple, classic foods (with Mario Batali a notable exception). I would like to think that spaghetti al pomodoro would be a similar meal. Would it be my choice for a least meal? I don’t know. I don’t particularly relish the idea of devising a last meal.

In any case, I do like simple tomato sauces on pasta. There’s something both comforting and tasty about it. I’ve tried a number of different techniques and, while I still like a complicated ragú based on my grandmother’s, I think I’ve found a good option for a simple and fresh version.

This recipe really depends on the freshness of the tomatoes. I really don’t think it would nearly as well with canned tomatoes (even San Marzano). When we went to the Santa Monica Farmer’s market, I found several smallish tomatoes that were advertised as being especially for sauce. Given that I only ever really use tomatoes for sauces, I figured they’d be a good choice.

CRW_9743

This is fundamentally a simple recipe. The hardest part is making the pasta but that could be easily replaced by factory pasta.

My technique for pasta making comes mainly from experimentation. I have found that a ratio of 1 cup of King Arthur all purpose flour to 1 extra-large egg (the size of the egg is important). This is not the ratio recommended in any cookbook I’ve ever found (most recommend using large eggs but extra-large eggs are cheapest atTrader Joe’s). I don’t know how important the brand of flour is. I always make my pasta by the well method as it doesn’t seem worth dirtying my mixer bowl.

I wouldn’t recommend rolling the pasta by hand. I tried once (before I had a pasta maker) and it was a disaster. Without a pasta maker, use factory made pasta.

CRW_9737

Spaghetti al Pomodoro (Spaghetti with Tomatoes)
Adapted from Essentials of Classic Italian Cooking

1 lbs. tomatoes
1/4 large onion, skin removed
2 1/2 tbsp butter
Fresh pasta made with 2 cups of flour and 2 eggs
2 basil leaves
1/4 cup grated parmesan cheese

  1. Slice the tomatoes in half vertically and place them in a skillet. Cover the skillet, turn the heat to medium and cook for 10 minutes.
  2. Remove the tomatoes from the skillet and run them through a food mill (alternately, skin the tomatoes and then dice them).
  3. Return the tomatoes to the skillet and add the onion and butter. Slowly simmer over medium heat for 30 to 45 minutes, stirring occasionally.
  4. Slightly undercook the pasta in salted boiling water (taste the pasta for doneness). Discard the onion and add the pasta to the skillet and cook for 1 minute more.
  5. Serve the pasta with slivers of basil leaf and parmesan cheese on top.

Serves 2 or 3.

CRW_9742

Fresh Pasta

1 egg per cup of flour

  1. Place the flour on a board and make a well in the center. Break the eggs into the well.
  2. Using a fork, mix the eggs together. Slowly, add flour from the edges of the well. Eventually, the mixture will be too mixed to use a fork. Switch to your hands and mix the eggs and flour together.
  3. Once the mixture becomes somewhat homogeneous, start kneading the dough. Knead for several minutes after it has come together.
  4. Divide the dough into fourths. Feed each through the pasta maker individually. Start on the largest setting, feed the dough through, then fold in half, and feed through again. Repeat until the dough has become uniform.
  5. Feed the dough through the pasta maker at smaller settings until reaching the desired thickness (on the Kitchenaid Pasta Maker this is 6 for spaghetti for me). It should go through at least four settings on the pasta maker in total. Sprinkle flour on each piece of dough so it doesn’t stick.  And remember, when determining thickness, the pasta will approximately double in width when it’s cooked.
  6. Cut the dough into the desired shape (I use the larger pasta cutter for the spaghetti al pomodoro).
  7. Coil the pasta together and sprinkle with flour so it doesn’t stick.
  8. Cook the pasta in salted boiling water. It will be done about 2 to 3 minutes after it floats to the top.

Serves 1 per egg/cup of flour.

Penne con Fiori di Zucchine (Penne with Zucchini Blossoms)

CRW_9685

Last weekend, we went to the Santa Monica Farmers’ Market, because the Long Beach Farmers’ Market was closed because of the marathon. While there, I found some zucchini blossoms which aren’t usually sold in Long Beach (we have options for which vendor to buy something from but there isn’t a whole lot of variety in types of produce). I spent most of the week trying to make something with them but we kept getting side tracked with other options for dinner (we, uh, mostly ate out this week).

I had never actually eaten zucchini blossoms before but they always looked good on television (I have a confession to make: I watch way too much of Molto Mario). So I had no idea if I’d like them or what the best way to prepare them was. So I just picked something that looked reasonably good. I also needed something where the pickier eater in the family would have something to eat (it bothers me when she makes instant macaroni & cheese or a microwavable pizza when I’m at home) no matter what.

CRW_9676

So I ended up making pasta because at worst we could eat the pasta. And the pasta was quite good. It was good enough that this dish would be good without the zucchini blossoms. Angela described it as being both light and heavy at the same time and I’d have to agree. It had body but it wasn’t overly heavy and filling. It was really just a nice pasta dish.

I did like the zucchini blossoms but the blossoms themselves seem to get lost in the sauce of this dish. I believe they add flavor but I’m not sure if this is the best use of the zucchini blossoms themselves (next time I find them I may try stuffing and frying them).

CRW_9682

Penne con Fiori di Zucchine (Penne with Zucchini Blossoms)
Adapted from Trattoria Cooking

6 small zucchini flowers with small zucchini attached
2 tbsp olive oil
1/2 tbsp unsalted butter
2 oz. panchetta, diced
1 garlic clove, diced
1/2 cup dry white wine
2 tbsp chicken broth
1/2 cup heavy cream
salt and black pepper
1/2 pound penne
1/4 cup parmesan cheese

  1. Separate the flowers from the zucchini. Remove the stamen (the part inside the flower) and any remaining stem from the flowers and zucchini. Rinse the flowers and zucchini under cold water and dry with paper towels. Cut the flowers into quarters lengthwise. Slice the zucchini thinly.
  2. Cook the pasta in boiling salted water for 1 minute less than specified by the directions.
  3. In a large sauce pan, melt the butter with the olive oil over medium-high heat. Add the panchetta and cook until browned, 2 to 3 minutes. Add the zucchini, flowers, and garlic and cook for 1 minute.
  4. Add the wine and stir, scrapping any brown bits, until the wine is almost completely reduced, about 3 minutes.
  5. Stir in the broth and the cream. Season with salt and pepper. Simmer until the sauce is thickened about 4 minutes.
  6. Add the cooked pasta and cook for one minute more, stirring regularly.
  7. Serve with parmesan cheese.

Serves 2.

Slow cooker “BBQ” Spareribs

CRW_9662

Who doesn’t love pork ribs? Well, I can definitely see those with OCD having a problem with it. But the mess is part of the fun.

Of course to make them for real you need to smoke them low and slow (or at least that’s the rumor). Unfortunately, despite our apartment complex having the name “Patio Gardens” we have neither a patio nor a garden (that’s what we get for living on the second floor), so I can’t actually smoke them over charcoal for hours and hours. That and I have to go to work on Mondays so it couldn’t have been dinner in that case.

Enter the slow cooker. Sure, it’s not real barbeque (hence the quotes in the title; they are not superfluous) but it’s as close as I’m going to get in the near future. And, frankly, it’s still good so who really cares?

CRW_9657

Slow cooker “BBQ” Spareribs

1/4 cup All Purpose Red Rub
1/2 rack pork spareribs (about 2 lbs)
1 tbsp canola oil
1 bottle barbeque sauce (preferably Dinosaur Bar-B-Que)

  1. Preferably one day before serving, trim any excess fat from the spareribs and cover them well with the red rub. Refrigerate until ready to cook.
  2. Remove the spareribs from the refrigerator and dry the outside with paper towels (some of the rub will come off). Heat a large skillet (preferably cast iron) over high heat with the canola oil until smoking. Brown the spareribs in the skillet, about 2 to 3 minutes per side (the rib side won’t brown particularly well because of the curvature of the ribs).
  3. Place the spareribs in the slow cooker and cover with barbeque sauce. Cook on low heat for at least 8 hours. Remove from the slow cooker and allow to rest for 15 minutes before serving.

Serves 2 to 3.

CRW_9655

All Purpose Red Rub
Adapted from Dinosaur Bar-B-Que: An American Roadhouse

1/2 cup paprika
1/2 cup kosher salt
1/2 cup light brown sugar
1/2 cup garlic powder
6 tbsp onion powder
1/4 cup chili powder
1 tbsp black pepper
1 tsp ground cumin
1/2 tsp cayenne pepper

  1. Combine all ingredients in a sealable plastic container and mix well.

Makes 2 3/4 cups.

Fried Chicken

CRW_9635

Every once in awhile I get a craving for fried chicken. And the sad thing is, until yesterday, I’ve been unable to make it and there’s a dearth of good fried chicken here (I have still yet to try Roscoe’s Chicken and Waffles). I’ve tried a number of recipes (including Cook’s Illustrated among others) and none of them satisfied (usually the batter didn’t come out correctly).

I mean, fried chicken has a look. Everyone knows what fried chicken looks like. And mine never did. It was either too pale or too dark. Or it had mostly fallen off the chicken. And it didn’t have a satisfactory taste to it.

CRW_9633

But that all changed last night. I finally had fried chicken success. I was finally a fried chicken master. The chicken was browned. It had the look. It was juicy all the way through (is it me or is one of the most disappointing things in the world dry fried chicken breasts?) Okay, it came out overly salty (I’m blaming that on my over optimistic reading of the line “brine for at least 4 hours or overnight”; when they say overnight, the Lee Brother’s apparently don’t mean 24 hours). But it was still good. Very good. And it was even better with their biscuits and creamed corn.

CRW_9637

Fried Chicken
Adapted from The Lee Bros. Southern Cookbook: Stories and Recipes for Southerners and Would-be Southerners

3 chicken thighs, bone-in and skin-on
3 chicken legs, bone-in and skin-on
3 cups peanut or canola oil

Brine:
2 cups water
1/4 cup kosher salt

Dredging Mixture:
1/2 cup all purpose flour
3 tbsp cornmeal
2 tsp kosher salt
1 1/2 tsp black pepper

  1. In a medium bowl (one that holds about 2 to 3 quarts; mine is actually my “small” bowl), stir together the brine ingredients until the salt is dissolved. Trim any excess fat from the chicken thighs and legs (on mine, there was a large layer of fat on the underside of the chicken thighs) and then add them to the brine. Cover the bowl and place in the refrigerator. Brine for 4 hours and up to overnight (which is what the recipe said; I brined over night and the chicken was too salty; in this case, overnight should mean no more than 8 hours or so). Remove the chicken from the refrigerator at least two hours before cooking so that it can come up to room temperature.
  2. In shallow dish mix the dredging mixture together (I actually have a set of plastic dishes that are designed for breading food). Dredge each piece of chicken through the dredging mixture, until coated thoroughly. Shake off any excess.
  3. In a large skillet (preferably cast iron and you need it to hold all the chicken), add enough oil to coat the bottom by 1/3″. Heat the oil over high heat until it reaches 325ºF. Add the chicken skin side up, cover the pan, and cook for 6 minutes. Turn the chicken, cover the pan, and cook for another 6 minutes. During the cooking process attempt to maintain the heat between 325ºF and 350ºF.
  4. Remove the chicken to a paper towel covered plate.

Serves 2 to 3 (we had leftovers which are my lunch today).

Madeleines

CRW_9610

I have no idea where my love of madeleines developed from. At some point in the past year, I knew that I liked them but I don’t know when I had had them. I do know that the ones usually available in the US are expensive (seriously, Trader Joe’s sells them for about $1 per cookie) and not particularly good.

This summer, I had decided that at some point in the indefinite future I was going to get madeleine pans. Whenever we’d go into a store that would sell esoteric kitchen supplies, I’d look for them and determine that I really didn’t want to buy a single use pan (Alton Brown would be upset with me now) for $12 (realizing that I’d probably need at least two to make them effectively).

CRW_9598

When my in-laws came to visit, we tend to end up at shopping locations more frequently. As I was still on my quest, I continued to look for them and mentioned to my in-laws. About a week after they had left, a package arrived in the mail for Angela and I and, lo and behold, there were two non-stick madeleine pans inside. Apparently, my mother-in-law had decided that she needed to go out and buy them for me right away. Her decision was my gain.

This isn’t the first time I’ve made madeleines but the first time I’ve used this recipe. This recipes seems to produce a better texture but the other recipe (from Susan Herrmann Loomis) seemed to make one with better flavor. I think I may combine the two at a later date. Either way, madeleines are always good.

CRW_9600

Madeleines
Adapted from Baking: From My Home to Yours

1 1/3 cup all purpose flour
1 1/2 tsp baking powder
pinch of salt
1 cup sugar
grated zest of 2 lemons
4 large eggs, at room temperature
4 tsp vanilla extract
12 tbsp melted butter, cooled

  1. Place madeleine pans in the refrigerator.
  2. Mix together the flour, salt, and baking powder in a bowl.
  3. In a mixer’s bowl, mix together the sugar and lemon zest with your finger.
  4. Add the eggs and, using the whisk attachment, mix at medium speed for 2 to 3 minutes. Add the vanilla extract and mix to combine.
  5. Fold in the flour followed by the melted butter.
  6. Remove the madeleine pans from the refrigerator and grease them. Place batter into pans, about 1 tbsp per madeleine.
  7. Refrigerate the pans and any remaining batter for at least 1 hour.
  8. Preheat the oven to 400°F.
  9. Bake the madeleines for 11 to 13 minutes. There’s no need to refrigerate any remaining batter before cooking.

Makes 24 madeleines.