Posts Tagged 'Recipe'


Molasses Spice Cookies

CRW_0414


Maybe I should start with a confession: I didn’t make these. Angela did. But I helped!

I like cookies a lot. They’re probably my favorite dessert to make. I think it’s the portability of the cookie that really appeals to me. There’s no need to get out a plate or fork. You can just pick it up and eat it wherever.

And I end up eating a lot of cookies. I’ve become known for it at work. I like them to take with my lunch and I’ve been known to (frequently) eat them for breakfast. It can’t be much worse than a donut can it?

CRW_0406


We didn’t follow this recipe in all regards. It called for adding black pepper and that didn’t appeal to us (well, Angela really since she made the cookies). Supposedly it adds a spicy surprise but I wasn’t sure that pepper was a flavor I’d like in my cookies. So we omitted it and the cookies are still quite good.

Strangely, I think the cookies are better the next day than they are freshly baked (heresy I know). They firm up a bit which improves their texture. If I were to make them again, I think I would add some grated nutmeg. There’s definitely a missing flavor (which could simply be the lack of black pepper) that I think nutmeg would correct. Either way, these are still some pretty good cookies and seem appropriately Christmasy for me.

CRW_0410


Molasses Spice Cookies
Adapted from Baking: From My Home to Yours

2 1/3 cup all purpose flour
2 tsp baking soda
1/2 tsp salt
2 tsp ground ginger
1/2 tsp ground cinnamon
1/4 tsp ground allspice
12 tbsp butter, softened
1 cup light brown sugar
1/2 cup molasses
1 egg
about 1/2 cup sugar

  1. Whisk together the flour, baking soda, salt, and spices.
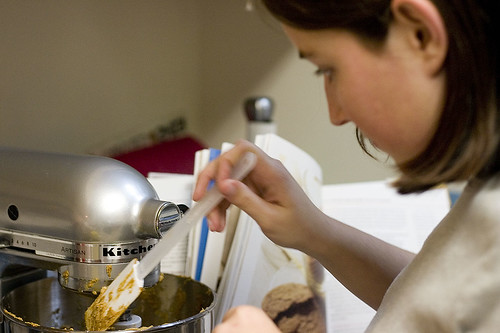
  2. In a stand mixer with a paddle attachment, beat the butter on medium speed until it becomes smooth and creamy.
  3. Add the brown sugar and molasses and beat to blend, about 2 minutes.
  4. Add the egg and beat for 1 minute more.
  5. Reduce the mixer speed to low and add the dry ingredients. Mix only until it is homogeneous. Turn off the mixer and verify that all the flour is mixed in by folding the mixture together several times with a spatula.
  6. Remove the cookie dough from the mixer bowl and divide it in half. Wrap each half in plastic wrap and refrigerate for 1 hour or more.
  7. Preheat the oven to 350°F. Line two cookie sheets with parchment paper.
  8. Remove the dough from the refrigerator. Divide one half into 12 different balls about 2 tbsp in size. Place each ball on a cookie sheet. Dip the bottom of a cup into sugar and press one of the balls flat, until it is 1/4″ thick. Repeat with the remaining balls and then the remaining half of the dough.
  9. Bake each cookie sheet for 12 to 14 minutes. Allow the cookies to cool and then remove them from the cookie sheet. Repeat with any remaining cookie sheets
  10. Store in a air tight container.

Makes about 24 cookies.

Sate Ayam (Chicken Satay)

CRW_0424


I didn’t intend to buy Cradle of Flavor but our public library was having a small book sale and there it was. I had seen it referenced but didn’t really know anything about it. But, for a dollar, how could I go wrong?

Saying I didn’t know anything about it is a bit of understatement. I didn’t (and really don’t) know anything about the food of Malaysia, Singapore, or Indonesia. I knew that it would share some similarities with other Asian cuisines but that was about it. I’d never even eaten it in a restaurant. But, hey, it was a dollar.

Whenever I look at Asian cuisine, I immediately get intimidated because I’m not familiar with so many of the ingredients. I know what ginger is but what exactly is lemongrass? (It’s a grass with a vague lemon flavor) Not to mention galangal? (It’s similar to ginger). I should mention that I hadn’t thought of looking at Wikipedia until now to get an idea of what they look like.

I decided to start with a dish that I had at least heard a passing reference to: chicken satay. Again, this is a dish I’ve never eaten (nor are any of the dishes in this cookbook). It seemed pretty straightforward: make a marinade, put the chicken in the marinade, skewer the chicken, and broil the chicken. The only part that was complicated was tracking down the appropriate ingredients.

CRW_0421


Lucky for us, there are any of a number of Asian grocery stores (either Chinese, Vietnamese, or Cambodian) around us. I was able to find both lemongrass and galangal there in the produce department. I used the galangal because I could find it. I did have to travel to Wild Oats Whole Foods for the coriander seeds as I had forgotten to get them elsewhere and they have bulk spices (and it only cost me $0.08).

The rest of the recipe is beyond easy. Outside of finding the ingredients, the only slightly difficult part is deboning the chicken and, if you were smart (e.g. not me), you’d buy boneless chicken thighs and be done with it.

The flavor is quite a bit different than what I’m used to. In many ways, it’s the complete opposite of food being made up of simple quality ingredients. The flavor is very complex from a rather long list of seasonings. But, in many ways, it was the fact that it was so different from what I normally eat that it was good. I liked it but Angela did not. Take that as you will.

CRW_0419


Sate Ayam (Chicken Satay)
Adapted from Cradle of Flavor

For the Marinade:
1 1/2 tsp coriander seeds
1 1/2 tsp fennel seeds
1 stalk fresh lemongrass
2 shallots
2 cloves of garlic
1 piece of fresh galangal, 1/2 inch long, peeled and thinly sliced (optional)
1 piece of fresh ginger, 1 inch long, peeled and thinly sliced
1 1/2 tsp ground tumeric
2 tbsp palm sugar or dark brown sugar
2 tbsp vegetable oil
1 tsp kosher salt

For the Satay:
1 1/2 lbs. bone-in chicken thighs
1 stalk fresh lemongrass
2 tbsp vegetable oil

  1. Put the coriander seeds and fennel seeds in a small food processor. Pulse until the seeds are ground into a powder, about 2 minutes.
  2. Cut the bottom and top off the lemongrass, leaving a piece about 5 inches long. Remove the tough outer layers of lemongrass. The lemongrass should be pale white-and-lilac in color. Cut the lemongrass thinly.
  3. Add the remaining marinade ingredients to the food processor. Pulse until the marinade forms a paste. Put the marinade in a bowl large enough to fit the chicken.
  4. Remove the skin from the chicken and debone. Cut the chicken into thin, bite-sized pieces. Add the chicken to the marinade and mix until the marinade coats the chicken. Allow to marinate at room temperature for 1 to 2 hours.
  5. Preheat the broiler for at least 10 minutes. Cut the top and bottom off the remaining lemongrass stalk. Bruise the thick end of the stalk with the back of a knife until the end becomes brush-like. Place the brush end of the lemongrass in a small bowl containing the oil.
  6. Place the chicken on the middle of the skewers, about 2 to 4 pieces per skewer. Place the skewers on a foil lined baking tray.
  7. Using the lemongrass brush, baste the chicken skewers with oil. Broil the chicken skewers for 5 to 7 minutes 3 inches from the broiling element. Turn over the skewers, baste with oil, and broil for another 5 to 7 minutes.
  8. Allow to cool for 1 minute and then serve immediately.

Serves 2.

Zuni Café Roast Chicken

CRW_0396


At the farmer’s market on Sunday, I noticed a new farm stand. It’s a little bit odd as this is the time of year that the farmer’s market shrinks a bit because a number of crops just aren’t growing anymore. What really intrigued me was that the farm, Ana’s Farm, was selling whole chickens.

For some farmer’s markets, this may be routine but our farmer’s market tends to be a bit smaller and concentrate on produce and, until recently, rather conventional produce. So, for me, this is cause for a bit of excitement. We like chicken and, so far, I’ve been pretty satisfied by the All-Natural Free-Range chickens that we’ve bought at Trader Joe’s. But I didn’t want to give up a chance to try a local chicken (despite the fact that it was pretty expensive).

CRW_0395


I didn’t ask what breed of chicken it was but I believe the vendor said that it wasn’t a Cornish chicken. It was pretty scrawny, about two and a half pounds, because, apparently, chickens stop eating for about a month when the weather changes.

I hadn’t come to farmer’s market with the intention of buying a chicken so I had to come up with something to cook with the chicken. And what better way to determine the quality of a chicken than by roasting it?

CRW_0402


But really, if you ask ten cooks how to roast a chicken, you’ll get at least eleven answers. Ever since we had eaten at the Zuni Café, I had wanted to try their recipe for roast chicken again (I had tried it previously off an internet recipe and wasn’t impressed but that was probably my fault). In the end, this ended up as a bit of a recreation of our meal at Zuni: I made french fries to go along with it.

Cooking the chicken was actually pretty easy. We did set off the smoke detector because the chicken let off too much smoke. And I did have to cook the fries a bit earlier as my oil started smoking and I didn’t have a better way to cool it off. The only frantic period was immediately at the end when I needed three or four different things to be done all at the same time (which is pretty usual with cooking dinner, for me at least).

And the results? That may have been the best roast chicken I’ve ever had. I’m not sure how much of it was technique and how much was the chicken itself, but I know two things: how I’m going to roast chickens from now on and where I’m going to buy them. I usually like dark meat but, on this chicken, the white meat was a combination of being moist and flavorful. The dark meat was a little more disappointing: it was a bit tough, particularly in the drumstick, but still tasty. I’m getting hungry just looking at the pictures again.

CRW_0375


Zuni Café Roast Chicken
Adapted from The Zuni Cafe Cookbook

a 2 1/2 to 3 1/4 lbs. chicken
salt and pepper
4 sprigs of thyme
1/4 cup of water

  1. At least 24 hours in advance, prepare the chicken. Cut out any fat surrounding the entrance to the cavity. Dry the chicken skin with paper towels. Starting from the cavity entrance, create a pocket between the skin and the breast meat and place a sprig of thyme on each side. Do the same for the thighs. Generously sprinkle salt all over the chicken, with more salt on thicker areas. Grind pepper on to the chicken. Cover and refrigerate.
  2. Remove the chicken from the refrigerator an hour before cooking and dry its skin with paper towels again. Preheat the oven to 475°F. Place the roasting tray in the oven to preheat for 15 minutes before cooking. Remove the roasting tray from the oven and place the chicken in it, breast side up.
  3. Place the chicken in the oven and cook for 30 minutes. If the chicken does not being to sizzle and brown, increase the temperature. If the skin starts smoking, reduce the temperature.
  4. Turn the chicken to be breast side down and cook for 10 to 20 minutes depending on chicken size (ours only needed 10 minutes).
  5. Turn the chicken to be breast side up and cook for 5 more minutes.
  6. Remove the chicken from the oven and then from the roasting pan. Place the chicken on a warmed plate and let rest for 5 minutes.
  7. Add the water to the roasting pan to deglaze it. Bring the sauce to a boil and cook for about 2 minutes.
  8. Cut the chicken into pieces and drizzle with juices in the roasting pan. Serve.

Serves 2.

Dungeness Crab Bisque

CRW_0381

For my birthday, we got two live Dungeness crabs. Trying not to be wasteful, I put the crab shells in the freezer with the plan on doing something with them. It took me about two months, but I finally found the time and inclination to actually use them. So, I decided on crab bisque.

I did, however, have a little bit of a problem finding a recipe for it. Most recipes seem to think you’ve got some live or at least uncooked crabs that you’re planning to make into soup. To me, this is more than a bit wasteful. Why use rather expensive uncooked crabs when you can instead use left-overs (plus that’s what I had). A lot of the recipes (including Julia Child’s) were really for lobster bisque with brief instructions on how to modify it for crab or shrimp. Which really isn’t that big of a deal but it’s easier for me if I’m making the intended recipe (particularly for something I’ve never made before).

In defense of the internet, a quick Google search did lead me to an appropriate recipe. And the recipe worked out pretty well. I did need to cook the stock for a bit longer than the recipe specified; it was pretty weak when I tasted it after the proscribed cooking time. I may have also added too much cayenne pepper (or at least that’s what she-who-must-be-obeyed said).

Now, I had never had crab bisque before so it’s hard to compare it’s quality. It tasted pretty good to me but it would probably work better as a first course than as a whole meal (of course we opted for it as a meal as I’m too lazy to make more than one labor intensive thing at a time). The consistency was also a little different as I opted not to strain it so there were chunks of rice and shallots and whatnot in it. It still was pretty tasty.

And, in my defense, the soup looked like that in real life. How do you go about making pictures of crab bisque look appetizing?

CRW_0379

Dungeness Crab Bisque
Adapted from Simply Recipes (in turn adapted from Williams-Sonoma Mastering Soups and Stews)

2 tbsp butter
1/3 cup diced shallots
1/2 cup dry vermouth
4 cups crab stock
1/4 cup white rice
2 tbsp tomato paste
1 cup cooked crab meat, cleaned
1 1/4 cup heavy cream
salt
cayenne pepper

  1. In a large soup pot, melt the butter over medium heat. Add the shallots and cook until they are softened, about 5 minutes.
  2. Add the vermouth, crab stock, white rice, and tomato paste and bring to a boil. Reduce heat to a simmer and cook for 25 minutes or until the rice is fully cooked. Remove from the heat.
  3. Add the crab meat to the soup. Working in batches, purée the soup to the desired consistency. Return the soup to the pot.
  4. Add the heavy cream and bring to a simmer. Cook until the soup has thickened slightly. Season with salt and cayenne pepper to taste.
  5. Serve in a bowls.

Serves 2 to 4.

CRW_0378


Crab Stock
Adapted from Simply Recipes (in turn adapted from Williams-Sonoma Mastering Soups and Stews).

4-6 cups crab shells, broken into small pieces
1/2 cup dry vermouth
1 large onion, peeled and sliced
1 carrot, cut into large chunks
1 celery stalk, cut into large chunks
a bouquet garni made up of several parsley sprigs, 2 thyme sprigs, 12-15 peppercorns and 1 bay leaf
salt

  1. In a stock pot, place the crab shells and add water until it comes 1 inch above the top of the shells.
  2. Place the stock pot over medium-high heat and bring to a simmer. Reduce the heat and maintain a slow simmer for 1 hour. Skim the surface of the stock to remove scum.
  3. After the stock stops to produce scum, add the vermouth, onion, carrot, celery, and boquet garni. Continue to simmer for 1 hour more.
  4. Drain the stock through a cheese-cloth lined strainer. Taste the stock for strength. If it’s not strong enough, boil the stock until it reaches the desired strength.
  5. Season the stock with salt to taste.

Makes 2-3 quarts of stock.

Moroccan-Style Pork Tenderloin

CRW_0365


I can’t be the only person who has to stop and think every time they see a recipe specifying either pork loin or pork tenderloin. I always have to stop and think which is which. For us, pork tenderloin is just the right size for two people whereas a pork loin is bigger than we could ever conceivably eat.

We eat a lot of pork tenderloin because Angela always asks for it (I think she likes the tenderness). I like pork so I’m pretty happy with it. So I’m always on the lookout for a new method to cook it.

I had purchased San Francisco Flavors from the Barnes & Noble discount shelf when we were in San Francisco. I didn’t know much about it but figured it would, at worst, be provide good memories of the trip. I picked it up while looking for something to make with the pork tenderloin. The ingredients for the Moroccan-Style Pork Tenderloin looked good so I figured I’d give it a try.

CRW_0352


I had to change the recipe a little bit. I didn’t have any oranges so I substituted lemon zest. I also only had ground cumin so I used that in place of cumin seeds. The only problem I had with the recipe were that it called for twice as long a cooking time as I ended up using. I had put the thermometer in to test it as it hadn’t been working properly before (it was reading 180ºF in the air) and it read 145ºF. I had to use another thermometer to check it as I didn’t believe the first one.

The pork tastes pretty good, particularly if not overcooked. It is, however, quite a bit spicy. Angela cut off the edges of her’s because it was too spicy. If you don’t like it spicy, decrease the amount of red pepper flakes.

Also, Moroccan is hard to spell (one r and two c’s).

CRW_0364


Moroccan-Style Pork Tenderloin
Adapted from San Francisco Flavors

1 1-lbs pork tenderloin
salt and pepper
1 large garlic clove
2 tsp grated lemon zest
1 tsp ground cumin
1/2 tsp red pepper flakes

  1. Preheat the oven to 475ºF.
  2. In a small food processor, combine the garlic, lemon zest, cumin, and red pepper flakes. Process until it forms a paste.
  3. Dry the tenderloin with paper towels. Salt and pepper all sides of the pork. Rub the paste on all sides of the pork, as evenly as possible.
  4. Place the pork on a roasting tray and place in the middle of the preheated oven. Cook for 20 minutes or until the pork reaches 145ºF internal temperature. Remove the pork from the oven, cover with aluminum foil, and let rest for 10 minutes.
  5. Slice the pork and serve with jasmine rice and sautéed spinach.

Serves 2.

Spaghetti all’Amatriciana

CRW_0350

As I’ve said before, simple pasta dishes appeal to me. There’s something infinitely satisfying about taking a few good ingredients and turning them into something spectacularly good. And while Dr. Atkins may not approve of a meal like this, it’s one of my favorites. It’s actually good enough that we served it as a course for Christmas last year (we served a meal in the Italian style).

This dish is becoming increasingly popular on Italian restaurant menus. Particularly, those that want to appear more authentically Italian (as opposed to Italian-American). The sad thing is that they seldom have an authenticity nor are they particularly good. Angela ordered one a few weeks ago that wasn’t spicy at all.

And, really, this is such a simple and fast dish that a restaurant should be able to do a very good rendition of it without too much effort. I would be fine if it wasn’t this most authentic but at least make it taste good. There’s no real excuse.

CRW_0342

The recipe itself takes about 40 to 45 minutes to make. For me, that’s a pretty quick dinner (but not Rachel Ray speed). I usually prepare the ingredients and then start cooking the sauce. Once the tomatoes are added and they begin to simmer, I start boiling the water for the pasta. When the pasta’s done, I add it to the sauce and go from there.

I don’t know exactly how authentic this recipe is. It does use pancetta in place of guanciale (I would try to make some if I could find a local source for pork jowl). It also uses spaghetti in place of bucatini (bucati was available at Trader Joe’s for a month or so but was nearly impossible to actually eat). The taste seems pretty close to what I had in Rome but I don’t know how memory has influenced that. Either way, it’s still pretty tasty.

CRW_0336

Spaghetti all’Amatriciana
Adapted from Roma: Authentic Recipes from In and Around the Eternal City
CRW_0346

1 tbsp olive oil
2 oz. pancetta, diced
1/4 cup diced onion
a pinch of red pepper flakes
1 tbsp tomato paste
1 14.5 oz. can of diced tomatoes
salt
2 tbsp Pecorino Romano, grated
1/2 lbs. spaghetti

  1. Place the olive oil in a skillet over medium-high heat. When the oil is hot, add the pancetta and onion. Cook until the pancetta is browned.
  2. Add the red pepper flakes (add more or less depending on your taste) and the tomato paste. Stir well and allow to cook for one more minute.
  3. Add the tomatoes and their juices to the skillet. Scrap up any browned bits. Simmer the tomato sauce for 30 minutes.
  4. Bring salted water to a boil and add the spaghetti. Cook for one minute less than indicated on the package, about 7 minutes. Drain the spaghetti.
  5. Stir in half the Pecorino Romano into the sauce. Add the spaghetti and mix well. Cook for one minute more or until the pasta is al dente. Add the remaining Pecorino Romano.
  6. Serve with additional Pecorino Romano to sprinkle on top.

Serves 2 to 3.

Poulet Sauté aux Herbes (Sautéed Chicken with Herbs)

CRW_0332


Julia Child said that in France the chicken tasted more chickeny. I like to think that she was talking about this dish.

The problem with a lot of chicken dishes is that they really don’t taste like much. How many times have I had a grilled chicken breast or chicken caesar salad that didn’t really taste like much of anything? And yet chicken is the most popular form of protein in the United States.

When I first made this recipe, it was refreshing to find a chicken recipe that actually tasted like, you know, chicken. It quickly became one of my wife’s favorite meals.

CRW_0324

And, it’s not only good, it’s also pretty easy. It takes about 45 minutes including preparation time. It’s even faster if you quarter the chicken the night before (or as soon as you get it home from the store). It’s easiest enough for a weeknight but tastes good enough for a special occasion. I’ve even made it when visiting family on the other side of the country.

The dish is decent with a mass produced whole chicken but even better with an all-natural or organic bird. This is the dish that made me switch my change my chicken buying habits.

When I quarter my chicken, I don’t use the wings (we never eat them). I also bone and skin the chicken breasts (Angela prefers them that way). If the breast halves are large, I cut them in half again. I usually save the chicken carcass for making stock later on.

The pan sauce made is really for topping the chicken. In our household, we usually dip bread into it. Usually I serve this with a potato gratin and green beans or peas. A light white wine also goes well. Last night, we had a Lucas & Lewellen Chardonnay (it wasn’t overly oaked or buttery so it worked well with this dish).

CRW_0327
Poulet Sauté aux Herbes (Sautéed Chicken with Herbs)
Adapted from Mastering the Art of French Cooking

1 3-4 lbs. chicken, quartered
salt
4 tbsp butter
1 tbsp vegetable oil
1 tsp dried thyme
1 tsp dried tarragon
1 tsp dried basil
pepper
1 tbsp shallots, minced
1 cup chicken stock

  1. Preferably the night before, salt the chicken on both sides and refrigerate until the next day (if not salting the night before, salt immediately before cooking).
  2. Dry the chicken with paper towels thoroughly. Heat 2 tbsp butter and 1 tbsp vegetable oil in a large skillet over medium-high heat. Brown the chicken in the skillet on both sides, in batches if necessary. Remove the chicken to a plate and reduce the heat to medium.
  3. Sprinkle the herbs on each side of the chicken. Season the chicken with pepper.
  4. Add the dark meat (thigh and leg) pieces back into the skillet and cover. Cook over medium heat for 8 minutes.
  5. Turn the dark meat chicken and add the remaining chicken to the skillet. Cover and cook for 15 minutes, turning once.
  6. Remove the chicken from the skillet and cover with aluminum foil. Add the shallots to the skillet and cook until softened, about 1 minute.
  7. Add the chicken stock and increase the heat to high. Boil the sauce until its slightly reduced, about 3 to 5 minutes. Remove from heat. Stir in the remaining butter.
  8. Serve the chicken with the pan sauce.

Serves 4 to 5.

Gamberi alla Cannavota (The Shrimp of Trattoria Cannavota)

CRW_0171


When I first tasted these shrimp, my response was “best shrimp ever.” To be honest, I’m prone to hyperbole. However, this time I wasn’t exaggerating. These were the most exquisite shrimp I’ve ever tasted. The quality of the shrimp themselves wasn’t particularly high: they were frozen farmed shrimp from Trader Joe’s.

The blessing and the curse of shrimp is that they have a relatively mild flavor. Shrimp just don’t taste particularly much like shrimp. And, frankly, most shrimp applications are lacking. I wish I had the idea of making a shrimp stock to use in the sauce to go with the shrimp. It makes perfect sense: it’s similar to using chicken stock for pan sauce for chicken.

But, because shrimp are so small, the flavoring of the stock goes even further. The shrimp manage to absorb a lot of the flavor from the shrimp stock even though they’re only cooked in it briefly. With apologies to Julia Child, the shrimp tasted more shrimpy.

CRW_0161


The recipe itself is pretty straightforward. You make a shrimp stock with the shrimp shells. Then the shrimp are pan-fried in olive oil and a reduction is made with some garlic and the shrimp stock. The only modification I made to the recipe were to use dry vermouth instead of white wine and to brine the shrimp.

If you think that brining poultry makes a difference, wait until you try it on shrimp. It improves the texture immensely and it also means that there’s a larger window for cooking the shrimp in. It also doesn’t take very long which is nice.

If you like shrimp, I implore you to try this recipe. It really is that good.

CRW_0166


Gamberi alla Cannavota (The Shrimp of Trattoria Cannavota)
Adapted from Trattoria Cooking

For the Shrimp Stock:
1 lbs. shrimp shells
1 small carrot, cut into three pieces
1/2 onion, peeled and cut in half
1 stalk celery, cut into three pieces
2/3 cup dry vermouth
4 cup water

For the Shrimp:
1 cup water
1/4 cup kosher salt
1/4 cup sugar
6 ice cubes

1 lbs. shrimp, peeled and deveined
1/4 cup olive oil
2 cloves garlic, diced
1/4 cup dry vermouth
1 tbsp softened butter
2 tbsp parsley, diced

  1. Combine all the ingredients for the shrimp stock in a sauce pan. Cook at a high simmer over medium-low to medium heat for 1 to 1 1/2 hours or until the shrimp stock is reduced to 1 cup. Drain the stock through a strainer and reserve the stock. This can be prepared in advance and the shrimp stock refrigerated until used.
  2. Put 1 cup of water, the kosher salt, and the sugar in a sauce pan over high heat. Stir the contents until the salt and sugar are desolved in the water. Remove from the heat and pour into a heatproof bowl. Add the ice cubes. When the brine is cool, add the shrimp for 15 minutes. Remove the shrimp from the brine and pat dry.
  3. In a large sautée pan, heat the olive oil over medium-high heat until just before smoking. Add the shrimp and cooked until they are lightly golden on both sides, about 1 to 2 minutes per side. Remove the shrimp to a plate.
  4. Add the garlic to the pan and cook until the garlic is golden, about 1 minute. Add the vermouth and the shrimp stock. Increase the heat to high and reduce the stock until it is a medium consistency. Taste for seasoning.
  5. Reduce the heat to medium and add the shrimp, butter, and parsley. Mix the contents well and cook for 1 minute more.
  6. Serve the shrimp in bowls with good bread.

Serves 2 to 3.

Costine al Vino Rosso (Pork Spareribs with Red Wine)

CRW_0155

There’s a regular fight in our house about what to have for dinner. Angela wants me to make something I’ve made before. I find that boring and want to make something new. Sometimes she wins, sometimes I win.

Last night, Angela wanted me to make Slow cooker “BBQ” Spareribs again. I wanted to make something new. This time I won.

Because we don’t have a grill (one of the downsides of apartment living), I decided to indulge my love of braises. And, really, how can pork braised in red wine and tomato sauce be bad?

CRW_0157

And it wasn’t to me. Sadly, Angela didn’t particularly care for it. I’m not entirely sure why. I know she just disliked the taste of the Jerusalem artichokes that I served with it. So, this recipe is not Angela approved (I’m thinking about making a graphic of Angela Approved Seal for recipes she likes; sort of an indicator as to whether or not a picky eater would like it).

As written, the recipe results in ribs that aren’t fall-off-the-bone tender. If I were to make them again, I’d braise them for longer. There’s also no salt involved in the recipe as written. I think Mario Batali was phoning it in on this recipe. I’ve updated the recipe to make it better.

Otherwise, I liked it. There’s room for improvement but it was still tasty.

CRW_0141

Costine al Vino Rosso (Pork Spareribs with Red Wine)
Adapted from Molto Italiano

1 1/2 lbs. pork spare ribs, cut into 2 inch pieces
3 tbsp olive oil
1 medium red onion, coarsely diced
1 carrot, peeled and cut into 2″ pieces
1 celery stalk, cut into 1″ pieces
1 cup red wine
1 cup chicken stock
1 cup basic tomato sauce
1 anchovy fillet, rinsed and patted dry
4 sprigs of rosemary
Salt

  1. Place the spareribs in a large pot and cover with cold water. Bring to a boil over high heat and then reduce to a simmer. Simmer for 30 minutes. Drain the spareribs and then rinse them. Season the spareribs with salt
  2. Add the olive oil to a dutch oven and heat over medium-high heat until the oil is just about smoking. Add the onion, carrot, and celery and cook until lightly browned, about 10 minutes.
  3. Deglaze the dutch oven with the red wine, scrapping up any browned bits. Add the chicken stock, the tomato sauce, and the anchovy fillet. Season the sauce with salt. Add the pork and stir together.
  4. Bring the sauce to a boil, cover, and reduce heat to a simmer. Cook for 2 to 2 1/2 hours or until the pork is fork tender. Serve in small bowls.

Serves 2 to 3.

CRW_0143


Basic Tomato Sauce
Adapted from Molto Italiano

2 tbsp olive oil
1/2 onion, finely diced
2 cloves of garlic, diced
1/4 carrot, finely diced
1 1/2 tbsp fresh thyme, diced
1 28-oz. can of whole tomatoes

  1. Heat the olive oil in a sauce pan over medium heat. Add the onion and garlic and cook until lightly browned, about 8 minutes.
  2. Add the carrot and thyme and cook until the carrot is soft, about 5 minutes.
  3. Add the tomatoes and the tomato juice to the skillet. Break up the tomatoes with a spoon. Simmer the tomato sauce for 30 minutes. Season the sauce with salt.

Makes 2 cups (yes, that’s twice what you need for above, use the rest for pasta or something).

Gratin Dauphinois Madame Cartet (Madame Cartet’s Potato Gratin)

CRW_9945

The first time I bought crême fraîche (at Trader Joe’s) I was asked by the cashier what I used it for. I had to admit that I had never used it before but that I was hoping to use it for some kind of gratin.

I had tried several different gratin recipes from a simple scalloped potatoes to Julia Child’s Gratin Dauphinois among others. And, most of the time, they ended up good but either the potatoes fell apart because of being parboiled or they didn’t get cooked all the way or were sitting in a sea of cream. It was just hard to be satisfied with them.

Because crême fraîche is initially a solid, it’s easier to get it to cover all the potatoes without it settling to the bottom of the dish. It also means you don’t need to parboil the potatoes so they don’t fall apart when you put them in the dish.

I appreciate this dish because it’s simple. I can throw it together in 10 minutes and put it in the oven and not worry about it until dinner is done. And cheese is always good.

CRW_9936

Gratin Dauphinois Madame Cartet (Madame Cartet’s Potato Gratin)
Adapted from Bistro Cooking

1 garlic clove, cut in half
2 lbs. baking potatoes, peeled and sliced thinly
1 cup grated Swiss cheese
1 cup crême fraîche
salt

  1. Preheat the oven to 350°F.
  2. Rub the inside of a 6-cup gratin dish with the cut side of the garlic clove. Rub until the gratin dish is well lubricated with the garlic
  3. Layer half the potatoes in the bottom of the gratin dish. Spread half the crême fraîche over top. Sprinkle half of the cheese over the potatoes and season with salt.
  4. Repeat the previous step with the remaining potatoes, crême fraîche, cheese, and salt.
  5. Bake for 50 to 60 minutes or until the top is golden brown.
  6. Serve immediately.

Serves 4 to 6.